Announcement

Collapse
No announcement yet.

Bidule 170 - What we've learned - Build thread, Len

Collapse
X
 
  • Filter
  • Time
  • Show
Clear All
new posts

  • Bidule 170 - What we've learned - Build thread, Len

    Yes, it's true--- It's been a while, some time has passed and I can finally speak of it. (I'm joking here)

    My trusted Bidule met a horrible, gruesome death on the mountain during the recent Cumberland event. After approximately 168 hours of flight time on the the original plane, it was a silly oak tree that wouldn't get out of the way. ( the oak tree suffered severe damage too)

    RIP big guy!!!!


    Onto the next Bidule 170-2 build.

    This thread will incorporate most of the original modifications made to the highly capable Bidule 170 and include a few other appropriate mods learned along the way.

    The modifications needed to change this plane from a good tug into a GREAT, durable and dependable front line tow plane are few, in fact, the fewest of all the tow planes I've had.

    List of modifications needed

    1) remove the balsa sheeting on bottom from firewall to the main gear mount and replace with 1/8 LITE PLY

    2) add hardwood tri-stock around inside firewall and balsa tri-stock around inside cockpit wherever possible

    3) add landing gear side saddle to each side of the fuse

    4) install the Stewart nose wheel servo and plane saver

    5) add a plywood support to the LE of the elevator saddle on the fuse ( more on this later )

    6) change to Robart Hing Points and double the hinges on the Ailerons and flaps ( two next to each other )

    That's it for MUST DO modifications. There's always personal changes guys are doing or different idea's on ways to do thing's, but as for absolute must do mod's that's all there is.

    During this thread we'll address each issue and include some nice convenience changes or mods intended to make the tug even easier to maintain and operate but are not absolute necessary for the plane to be a front line tug.

    Items we'll address for convenience and personal preference.

    A) battery location

    B) adding disc brakes

    C) installing the header tank

    D) wing attachment clips

    E) nose wheel improvements

    F) cockpit hold down screws
    Click image for larger version  Name:	IMG_4130.jpg Views:	1 Size:	17.2 KB ID:	13829


    Not one of its finest moments.


    Steve here: since the forum does not permit comments on the first post of the thread, let me edit it by saying: IT WAS ME! I did it. Guilty. Hung the tow line in a tree and that was that. Biduleus Interruptis.
    Len Buffinton
    Team Horizon Hobby

  • #2
    New beginnings.

    When towing as much as we do, you always have another tow plane in stock.
    Here the backup Bidule is sitting on the shelf waiting to get the chance to perform.

    Click image for larger version

Name:	IMG_4150.jpg
Views:	920
Size:	51.3 KB
ID:	13831


    First operation is to split the covering on the bottom from the main landing gear mount up to the firewall. To make it easy, I just slit it in the middle and pulled it back over the side by about 1/4 inch, rough trim it to size and taped it down with BLUE tape, covering the fold so dust and debris will not get behind the covering.
    Removing the balsa bottom sheeting takes about 30 seconds, so enjoy it while you can.


    Click image for larger version

Name:	IMG_4164.jpg
Views:	964
Size:	48.7 KB
ID:	13832

    Next up for me is making a bulkhead for the "Stewart Nose Wheel Servo Saver"
    In the first Bidule the servo saver was attached to the firewall. This worked flawlessly but added weight to the nose, subsequently needed weight in the tail. This build is an aggressive attempt to minimize tail weight needed.

    The servo save will be installed just ahead of the wing tube. Since the CG for this plane is slightly forward of the CENTER OF THE WING TUBE, this location is the furthest AFT I can use and still have a straight shot for the pushrod.

    Remove the little lower bulkhead and ply floor as shown.

    Click image for larger version

Name:	IMG_4166.jpg
Views:	922
Size:	37.3 KB
ID:	13833


    Click image for larger version

Name:	IMG_4165.jpg
Views:	894
Size:	30.7 KB
ID:	13834


    Making a new bulkhead is simple, make a template from cardboard and use 1/4 aircraft ply for the bulkhead.

    Click image for larger version

Name:	IMG_4169.jpg
Views:	933
Size:	45.7 KB
ID:	13835

    The servo saver will be reused from the first Bidule, here it's fitted into the fuse in the new location

    Click image for larger version

Name:	IMG_4173.jpg
Views:	899
Size:	33.4 KB
ID:	13836

    Now, because there is a ton of pressure applied to the servo saver, we need to ensure the bulkhead won't flex. Construct a 1/4 ply beam support across the fuse, I pinned to to the bulkhead with 1/8 dowls and West Systems epoxy. Also add hardwood tri-stock to front and back of the new bulkhead.

    Click image for larger version

Name:	IMG_4188.jpg
Views:	895
Size:	27.9 KB
ID:	13837

    Click image for larger version

Name:	IMG_4190.jpg
Views:	924
Size:	26.3 KB
ID:	13838

    Once you're happy with the fit, epoxy the bulkhead in first. The top piece will have to be attached once the unit is installed or you'll never get it in the plane....


    Click image for larger version

Name:	IMG_4203.jpg
Views:	938
Size:	31.3 KB
ID:	13839

    I'm very happy with the new location and installation, so after it cured I moved onto installing the balsa tri-stock around the cockpit top edges. This is done to allow more gluing surface for corners. I also added a few plywood gussets from the firewall to the sides as Jim had done in his build thread.

    Click image for larger version

Name:	IMG_4207.jpg
Views:	894
Size:	38.8 KB
ID:	13842


    Len Buffinton
    Team Horizon Hobby

    Comment


    • eajbrian
      eajbrian commented
      Editing a comment
      So if the oak tree did not jump up and grab the plane, the 170 still ok? The structure failure is due to sudden stop caused by a land based object, correct?


      Brian

  • #3
    Misc photos from first steps.

    Click image for larger version

Name:	IMG_4151.jpg
Views:	976
Size:	29.0 KB
ID:	13845 Click image for larger version

Name:	IMG_4153.jpg
Views:	929
Size:	31.2 KB
ID:	13846 Click image for larger version

Name:	IMG_4206.jpg
Views:	957
Size:	33.0 KB
ID:	13847


    Click image for larger version

Name:	IMG_4169.jpg
Views:	975
Size:	45.7 KB
ID:	13848 Click image for larger version

Name:	IMG_4173.jpg
Views:	902
Size:	33.4 KB
ID:	13849

    Click image for larger version

Name:	IMG_4168.jpg
Views:	946
Size:	48.3 KB
ID:	13850 Click image for larger version

Name:	IMG_4152.jpg
Views:	972
Size:	29.7 KB
ID:	13851
    Len Buffinton
    Team Horizon Hobby

    Comment


    • #4
      This is cool! You can go right to it without having to 'evolve' for shortcomings in design. This build should be pretty quick!

      Comment


      • #5
        First operation is to split the covering on the bottom from the main landing gear mount up to the firewall. To make it easy, I just slit it in the middle and pulled it back over the side by about 1/4 inch, rough trim it to size and taped it down with BLUE tape, covering the fold so dust and debris will not get behind the covering.
        Removing the balsa bottom sheeting takes about 30 seconds, so enjoy it while you can.
        This is a great idea...I discovered that the fuselage bottom was just a thin sheet of balsa when mounting the canister brackets on my Bidule 170. In order to have a solid mount, we laminated the floor inside (from firewall to gear plate) with 1/8" plywood. The problem was the soft balsa bottom crushed when the canister mounts were tightened down. Making Len's modification is a better solution and will be incorporated into my second Bidule 170 build.
        A Site for Soar Eyes

        Comment


        • #6
          Jim,
          Opening the bottom right off the bat also helps with installing tri-stock, the servo saver bulkhead and the landing gear saddles, plus any other changes you desire without having to reach in from the top for everything.
          Len Buffinton
          Team Horizon Hobby

          Comment


          • JimD
            JimD commented
            Editing a comment
            Yep, reminds me of how we did the Porter modifications by opening the top of the fuselage.We will be copying this technique on our second Bidule.

        • #7
          Really nice build thread Len.

          Comment


          • #8
            Nice Len. Is the motor from the original ok? and the cans?

            Steve K
            Steve K

            Kremer Aerotowing Team

            Comment


            • #9
              Thanks Kris.

              Continuing on, after a long day cleaning leaves out of the yard I had the opportunity to get back into the shop. It's funny how the little things take the longest amount of time.

              I started by removing the existing tri-stock on the landing gear plate. Once removed I made a saddle for each side and replaced the tri stock with maple, this will allow more strength and gluing surface to help keep the gear in place.

              Before gluing, I fit hardwood tri stock around the firewall as well as started fitting a few pieced around cockpit.

              All the pieces were epoxied in place and braced for the night. ( the balsa tri stock in the cockpit gets installed with medium CA )


              Click image for larger version

Name:	IMG_4209.jpg
Views:	896
Size:	33.4 KB
ID:	13862 Click image for larger version

Name:	IMG_4213.jpg
Views:	900
Size:	29.5 KB
ID:	13863 Click image for larger version

Name:	IMG_4208.jpg
Views:	895
Size:	25.7 KB
ID:	13864 Click image for larger version

Name:	IMG_4211.jpg
Views:	888
Size:	22.5 KB
ID:	13865


              Click image for larger version

Name:	IMG_4212.jpg
Views:	883
Size:	32.3 KB
ID:	13866

              Len Buffinton
              Team Horizon Hobby

              Comment


              • Mosquito
                Mosquito commented
                Editing a comment
                Len what is the reason for the plywood saddles? Am I missing something? I can see why you used better triangle stock! (Added today) I can see now why. You had to make the gluing surface flush with the plywood wing tube supports. Helps to have a fuselage here to look at! Keep this thread going!
                Last edited by Mosquito; 11-15-2016, 04:54 PM.

            • #10
              This was the same modification I made when putting my Bidule together initially, BUT....

              When I modified my Bidule for retracts at Hammondsport/Windy Ridge this Spring, I found that the landing gear block in the Bidule fuselage did not use great construction techniques. The top of the gear block that you see from the inside of the fuse is essentially a piece of 1/8" lite ply, the same material that the rest of the fuse is made of. Underneath that is a block of wood, similar in density to bass wood. They were NOT laminated together. The top lite ply piece is tabbed into the fuse sides, and the "bass" block was only end glued to the fuse sides.... OK, OK, the block should only see mostly compression loads, but not so much when I pork a landing and drive through the long grass or drive into the back of a runway end berm... None the less, moral of the story is, and this was proven by how the landing gear block broke out in my Bidule, is that the maple tri-stock on top secures the 1/8" lite ply piece, but doesn't do anything to address the poor joining of the "bass" block underneath it. And another detail of the Bidule is that the lite ply used in its construction is really good at delaminating when it breaks, which means there is not a lot of strength in the layers of the plys used. SO, when I had the chance of gluing my gear block back in, I added cross formers of 1/8" aircraft ply that went from the bottom of the "bass" block to 1/2" above it and extended across the fuselage with "hooks" on the ends to tab over the top of the 1/4" ply saddles on each side of the fuse. I added maple tri stock on top of the lite ply piece in the corner with the cross formers. And of course, I made the join between the "bass" block and the lite ply piece a full lamination. It probably is overkill, but the "bass" block only being glued at the ends to the fuse sides with hot glue, I think, should be fixed in the build. Of course with that being said, I am the only one who has knocked the gear off too. So, I would like Len, Jim and Bob to chime in here on where they think the mods are sufficient. I guess Len essentially has already done that. I don't really think that forces added to the gear from breaking had much to do with my failure, I am sure it was a compression failure from a number of landings I slammed down carrier style, I do plan on modding the gear as I have described here on my next Bidule build.

              Comment


              • JimD
                JimD commented
                Editing a comment
                Scot, I did as you describe putting 1/8 inch aircraft plywood vertical pieces across the fuselage fore and aft of the gear block and added hardwood triangle all around. I also put blind nuts in the gear plate and ran longer screws up through and then topped them with nylon insert lock nuts.

                After 60 hours of flight time, I do see evidence of delamination between the hardwood block and lite-plywood sheet. My fix was to wick thin CA into the cracks, but this winter may call for this block to be cut out and replaced with more substantial material.

            • #11
              Great build thread. I'll be following behind you Len (and others) as I start my build in the upcoming week. Making triangle stock today from sitka spruce, basswood and balsa. You can never have enough of that stuff around!

              Tim

              Comment


              • #12
                YOur thread will help Mosquito and me a ton on our joint build starting this week...
                kevin

                Comment


                • #13
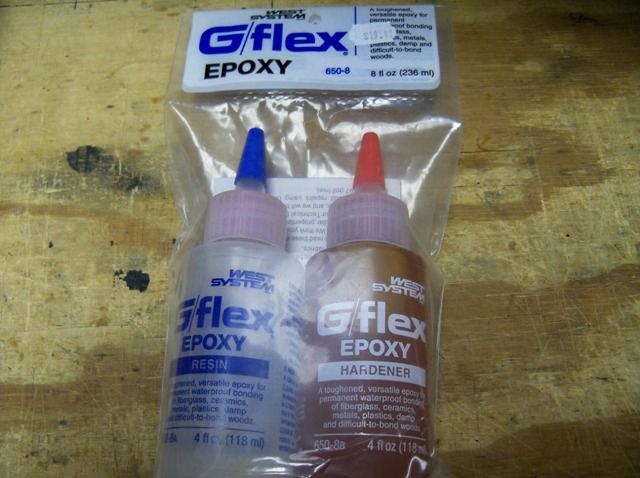
                  Gluing in hinge points is not one of my favorite things, but this West Systems G/Flex Epoxy is the best stuff I have found for the job. It really holds tight, is easy to work with, resists vibration damage, and has a longer cure time to allow time to position the hinges.

                  A Site for Soar Eyes

                  Comment


                  • #14
                    Love West G/Flex. Plus it's a simple 1 to 1 mixing ratio!

                    Tim

                    Comment


                    • #15
                      Thanks Jim,

                      I have some G-Flex and will definitely do that on this one.
                      Len Buffinton
                      Team Horizon Hobby

                      Comment

                      Working...
                      X