Announcement

Collapse
No announcement yet.

Jim G's Aviation Concepts 2-33A Build(Sort of)

Collapse
X
 
  • Filter
  • Time
  • Show
Clear All
new posts

  • #16
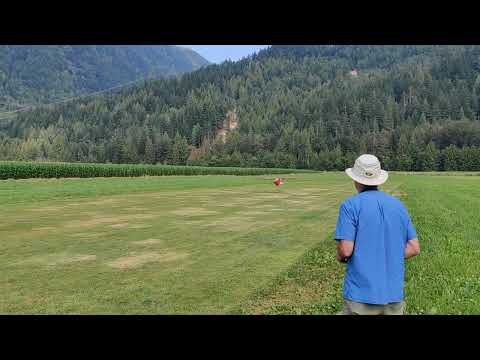
    We finally got a break from our snowy, cold and wet springtime(?) weather for me to do some final setup on the 2-33. I rechecked the CG after adding my 10oz of nose weight and I'm almost right on the center of the CG range. Hopefully I can take some weight out after I get some air time. Also, I bought myself a fishing scale and the AUW turns out to be 26lbs 10oz. Not too bad as Gunny states in the instructions that the prototype ended up at 27lbs. It also was a good time to set up all the control throws and finish the programming on my DX18. I am really impressed with the dive brake operation.

    I also did the final install of the cockpit interior that I had purchased with the kit. I'm glad I did as this cockpit is so massive it really needed some finishing details. The cockpit interior kit supplied by Aviation Concepts is very complete with detailed instructions(of course). I believe I received one of the early kits in that the 3/8" balsa seats were laser cut and there was quite a bit of burnout. Fortunately, a little sanding and filler solved that issue. I wanted to firm up the seats and that was accomplished with 0.5 oz fiberglass cloth and thinned laminating epoxy. Finish colors were applied with Klasskote epoxy paint. The pilot is from Tailored Pilots and is their 1/3 scale civilian pilot.

    After attaching the canopy restraint wire I quickly found that the canopy cross piece that it attaches to came loose. I'll have to add some reinforcement to the joints as a glue joint by itself is not sufficient. I'll post a few pictures of my repair, but in the meantime here's a few more photos of the big gal!!!.......................
    Jim
    Click image for larger version

Name:	IMG_2445.jpg
Views:	376
Size:	255.0 KB
ID:	47431 Click image for larger version

Name:	IMG_2439.jpg
Views:	377
Size:	228.8 KB
ID:	47429 Click image for larger version

Name:	IMG_2440.jpg
Views:	376
Size:	210.5 KB
ID:	47430

    Click image for larger version

Name:	IMG_2443.jpg
Views:	395
Size:	133.5 KB
ID:	47425 Click image for larger version

Name:	IMG_2444.jpg
Views:	379
Size:	72.8 KB
ID:	47426

    Click image for larger version

Name:	IMG_2441.jpg
Views:	368
Size:	139.0 KB
ID:	47427 Click image for larger version

Name:	IMG_2442.jpg
Views:	369
Size:	101.3 KB
ID:	47428

    Comment


    • #17
      A little canopy repair was in order as I quickly found that the glue joints failed for the cross piece that one end of the canopy restraint wire attaches to. A little CA stabilized the brace while I carefully routed a couple of narrow slots 1/2" long and approximately 3/16" deep. I've got some thin G10 fiberglass that I cut to fit the slots and glued in place using epoxy with some milled fiberglass mixed in for good measure. This stiffened the area substantially. I'm used to applying thickened epoxy fillets to wood canopy joints during construction, but totally overlook the stress that the large canopy restraint wire would impart on the cross brace. Simple fix.....here's a couple of photos.....
      Jim

      Click image for larger version

Name:	IMG_2446.jpg
Views:	366
Size:	151.7 KB
ID:	47454 Click image for larger version

Name:	IMG_2449Inked.jpg
Views:	349
Size:	62.9 KB
ID:	47455

      Comment


      • #18
        My 2-33 is ready to fly and I've got a couple of questions I would like some input on:
        1. I'm finding it is a bit of a beast to carry fully assembled. I'm considering getting a wing wheel like the photo below and a leash to move the 2-33 around at the field. What do you think? How do you handle it?
        2. In Gunny's instructions he notes that his takeoff mode has 7/16" down elevator mixed in as the 2-33 wants to get high on tow. I'm thinking of accomplishing the same using a slider on my xmtr so I can dial in the amount required. Comments?
        Thanks,
        Jim
        Click image for larger version

Name:	Wing Wheel.jpg
Views:	313
Size:	10.1 KB
ID:	47617

        Comment


        • Steve P
          Steve P commented
          Editing a comment
          The wing wheels are primarily for long wing skinny things. You might want to design your own for the high wing. A dog leash in the tow release is the typical way the big high and full wing stuff is moved around the field one wing simply low.

          Ending up with a dependable fixed tow mode preset after several trim flights is your goal. Even with minor variability you can start the plane porpoising. You really just want to keep wings level via ailerons, not adjust pitch through a tow. Simple is good.

          YMMV

        • RickS
          RickS commented
          Editing a comment
          Simply use a flight mode for launch. Use the same switch as the tow release. Set trims as specific to each flight mode. When the release is engaged you should be in flight mode "Launch". You can use the elevator trim to achieve the result you want. When tow is released you go back to whatever your other flight modes are and their individual trims.

        • mlachow
          mlachow commented
          Editing a comment
          With flight modes you can also turn off ailerons to rudder mix if you normally use that on sailplanes.

          Retractable dog leash is what I see most often with models this large. Picking up and lifting large wooden sailplanes requires care. Unlike small stuff, it is easy to damage things lifting in the wrong place.

      • #19
        i second the use of flight modes linked to the release switch as noted.. best option for perfect simple trim use

        Comment


        • #20
          Past time for an update. It flies! I was able to get some airtime on the 2-33 in August at the Agassiz, BC and Scio, OR aerotows. It pretty much flew right off the board with little or no trim changes and the CG as noted by Gunny on the plans/instructions looked to be right on for my flying style. It thermals great and is a gentle giant in the air. The top and bottom dive brakes are very effective and did not require any elevator compensation. This is definitely a keeper in my scale fleet and will be getting a lot more flying time next summer. Below are a couple of short videos at Agassiz of takeoff and landing.
          Jim

          Takeoff:

          Landing:

          Comment


          • #21
            Awesome! Congrats!
            Kevin K

            Kremer Aerotowing Team

            Comment


            • #22
              Jim, I just came across your thread and read it all. First off your 2-33 looks absolutely beautiful... congratulations! Also thank you for all the kind words too, I take pride in my kits and very happy you love the model.
              As you may or may not know during your build I was moving to West Virginia and never saw your build thread.

              To answer 2 of your questions;

              I use a retractable dog leash and no clip on wing tip wheel like they use on the big glass slippers. Just like the full scale i rely on the supplied wing tip wheels. However, when spinning the model on the ground lower the appropriate wing tip so they roll only forward. If you don't, the one wing tip wheel rolling in reverse can pop your silver solder joint.

              As far as the canopy cross member popping loose, what you did is good. Erich S. drilled and pinned his with small diameter carbon fiber rods.

              Gunny
              Gunny
              Aviation Concepts rc

              Comment


              • #23
                Gunny,
                I hope you are still making progress in getting your shop set up so you can get back to offering great kits this year and maybe a new offering or two
                Jim

                Comment

                Working...
                X