Announcement

Collapse
No announcement yet.

FlyFly DG 808S

Collapse
X
 
  • Filter
  • Time
  • Show
Clear All
new posts

  • #16
    First I used the heat gun and mitten to smooth out all the wrinkles. Click image for larger version

Name:	640IMG_4344resize.jpg
Views:	448
Size:	115.4 KB
ID:	10584
    The next issue was the well documented problem of the flap being hinged on top instead of the bottom. Click image for larger version

Name:	640IMG_4345resize.jpg
Views:	428
Size:	84.1 KB
ID:	10585
    I cut them loose and flipped them over and discovered that they really needed some wood added to the leading edge. So I stripped them down and glued on some scrap balsa and recovered them. Click image for larger version

Name:	640IMG_4347resize.jpg
Views:	442
Size:	93.0 KB
ID:	10586
    Click image for larger version

Name:	640IMG_4348resize.jpg
Views:	427
Size:	85.2 KB
ID:	10587
    Click image for larger version

Name:	640IMG_4349resize.jpg
Views:	417
Size:	85.6 KB
ID:	10588
    Click image for larger version

Name:	640IMG_4352resize.jpg
Views:	433
Size:	112.5 KB
ID:	10589
    I'm taking Len's advice and going with Hitec servos instead of the el cheapos. I found that by enlarging the openings HS-82MGs will fit in the aileron bay and HS-225MGs will work for the flaps. I started by adding some 1/8" plywood to the servo bay to raise the servo and reinforce the structure. Click image for larger version

Name:	640IMG_4353resize.jpg
Views:	432
Size:	91.1 KB
ID:	10590
    Then glued in some mounting blocks and used some G10 straps to secure the servos. I used the supplied servo covers.
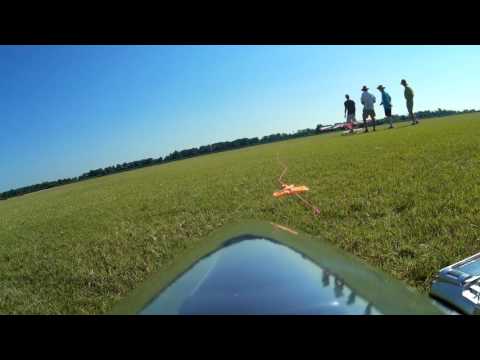
 Click image for larger version

Name:	640IMG_4354resize.jpg
Views:	419
Size:	88.8 KB
ID:	10591
    Click image for larger version

Name:	640IMG_4355resize.jpg
Views:	426
Size:	92.2 KB
ID:	10592
    Click image for larger version

Name:	640IMG_4356resize.jpg
Views:	417
Size:	119.7 KB
ID:	10593
    The canopy is next.
    Last edited by ingrahal; 06-10-2016, 04:39 AM.

    Comment


    • #17
      I got the canopy trimmed and glued to the base after installing the pilot. The pilot is a vacuum formed ABS copy of a pilot bust I had. I split the pilot figure in half front to back. Then used my forming machine to pull the two halves. Glued the halves together, sanded the seams and painted it. I still have to figure out how I'm going to secure the canopy.
      Click image for larger version

Name:	640IMG_4357resize.jpg
Views:	412
Size:	129.6 KB
ID:	10595
      Click image for larger version

Name:	640IMG_4358resize.jpg
Views:	434
Size:	119.3 KB
ID:	10596

      That's it for now. Next I'll work on the outer wing panels, securing the canopy, balance and then tidy up the wiring.

      Comment


      • #18
        The wings are done. The servos are installed and the outer wing panels are epoxied on. The outer panels were designed to be removable but the fiberglass joiners allowed too much slop. Rather than having them flapping up and down or go to the trouble of redesigning the joiners I just epoxied them. While I was finishing up with the servos I decided to make a set of servo protectors because the originals where just a little too small for the enlarged openings. I fashioned four plugs from balsa and plywood.
        Click image for larger version

Name:	640IMG_4359resize.jpg
Views:	445
Size:	93.0 KB
ID:	10672

        Then I formed some 0.015" ABS over the plugs and cut them from the sheet.
        Click image for larger version

Name:	640IMG_4360resize.jpg
Views:	423
Size:	119.8 KB
ID:	10673

        Here is the 0.030" ABS heating up for the final pull.
        Click image for larger version

Name:	640IMG_4362resize.jpg
Views:	417
Size:	129.3 KB
ID:	10674

        And the end result, a set of four servo protectors. I find a lot of uses for the vacuum forming machine.
        Click image for larger version

Name:	640IMG_4361resize.jpg
Views:	402
Size:	98.6 KB
ID:	10675
        Click image for larger version

Name:	640IMG_4363resize.jpg
Views:	415
Size:	83.9 KB
ID:	10676

        The last thing to do on the wings was the wingtips. Here is another little bit of weirdness. They come with a single threaded stud glued in. I was expecting a captive nut of some kind in the wing, but no, just a starter hole drilled in the end rib. After some checking, turns out the stud is a 6-40 thread. Thinking there might be a hardwood block in the wing I drilled and tapped the hole for 6-40. There was no hardwood so of course the tips won't tighten down much. So I will just hold them on with some vinyl tape.
        Click image for larger version

Name:	640IMG_4364resize.jpg
Views:	393
Size:	77.3 KB
ID:	10677
        Click image for larger version

Name:	640IMG_4365resize.jpg
Views:	392
Size:	83.3 KB
ID:	10678
        Click image for larger version

Name:	640IMG_4366resize.jpg
Views:	406
Size:	136.7 KB
ID:	10679

        Now I can check balance and finish this thing up.

        Comment


        • #19
          Pretty neat stuff! This will be a nice club airplane!

          Comment


          • ingrahal
            ingrahal commented
            Editing a comment
            Thanks Michael, I think so too. Hopefully our efforts will pay off and get some folks interested in Aerotow and gliders in general.

        • #20
          Ok I got the balance weight in, the wiring all sorted out, the radio programmed, the decals are on and unless I'm forgetting something this build is done.

          Here you can see the balance weight, 10 oz. of lead shot and epoxy and 4 oz. of removable lead strips. I'm also going with two 5 cell battery packs to help out. Without the strips it balances on the rear of the wing rod and it balances at the recommended 60 mm with the strips. I'll be able to fine tune between those two points. Click image for larger version

Name:	640IMG_4367resize.jpg
Views:	452
Size:	117.5 KB
ID:	10739


          I decided to use magnets to hold the canopy on. This went pretty smooth and I got a nice solid fit. Click image for larger version

Name:	640IMG_4376resize.jpg
Views:	410
Size:	116.5 KB
ID:	10740

          I filled and painted the ugly notch they had cut for the canopy locking tab. I think they had used a chainsaw to cut it. Click image for larger version

Name:	640IMG_4377resize.jpg
Views:	393
Size:	108.6 KB
ID:	10741
          Click image for larger version

Name:	640IMG_4378resize.jpg
Views:	416
Size:	115.9 KB
ID:	10742
          Click image for larger version

Name:	640IMG_4379resize.jpg
Views:	446
Size:	98.4 KB
ID:	10743


          Here is a couple of shots showing the layout of the electronics. Click image for larger version

Name:	640IMG_4368resize.jpg
Views:	423
Size:	153.3 KB
ID:	10744
          Click image for larger version

Name:	640IMG_4369resize.jpg
Views:	448
Size:	136.4 KB
ID:	10745


          Our kit did not come with an incidence pin for the wings. The tube that is installed in the fuselage is an odd size. The I.D. measures 0.110" or 2.80 mm. I had some 7/64 rod that fit ok but I still had to bend the rod slightly to make it snug. The root ribs in the wings had only a pilot hole so I drilled them with a 7/64 drill bit. Click image for larger version

Name:	640IMG_4375resize.jpg
Views:	418
Size:	72.0 KB
ID:	10746


          Here she is all finished up. Click image for larger version

Name:	640IMG_4372resize.jpg
Views:	417
Size:	190.3 KB
ID:	10747
          Click image for larger version

Name:	640IMG_4374resize.jpg
Views:	419
Size:	176.0 KB
ID:	10748

          The all-up-weight is exactly 8 lbs.
          We are going to try to maiden her this weekend. Hopefully I'll have some photos and video to post.
          Last edited by ingrahal; 06-17-2016, 07:53 PM.

          Comment


          • #21
            Good luck on the Maiden.

            Jeremy and Ben
            SCCAAA TT TN

            Comment


            • ingrahal
              ingrahal commented
              Editing a comment
              Thanks hope you are having fun in Monticello!!!

          • #22
            WoW the finished project came out great , love to see in-flight pic's

            Comment


            • ingrahal
              ingrahal commented
              Editing a comment
              Thanks Kuya!!!

          • #23
            Well the maiden went well. We got to the field about 7:30 and the temperature was already 79 deg. but there was a nice breeze and it was very comfortable. We got all the stuff set up, took the tow plane around the field a couple of times to warm her up, got the tow line hooked up, gave the tow plane the gas and she died. Uh that's weird, the DLE 30 never does that. About an hour and a half later after fiddling with the fuel system and the carb we finally got the maiden tow done. The first thing I noticed was that it was very hard to see going straight away on tow against a hazy sky. After release it was trimmed ok but flew like a brick. It was obviously nose heavy. I removed 2 oz. of nose weight for the second flight and it was a completely different plane. The glide was slower and it banked much better. I was able to work some lift and had a very enjoyable flight. I removed 1 more oz. for the third flight and noticed it was much harder to track the tow plane and got a nasty tip stall on turns with no warning at all. So the 1 oz. went back in nose. I'll have to check the balance and measure where it is and report back. At this point it was getting uncomfortably hot and we all decided to retreat to a local BBQ spot for lunch. There were several people taking photos and video so we should have plenty to show you as soon as they get them posted. All in all it was a big success and folks were fired up talking about getting planes of their own.

            Comment


            • #24
              Art,
              We had a second session with the glider last week and it went pretty well. She was balanced at 63 mm and was a little sensitive to stalling. More so than I thought she should be since folks on the other forum say she flies well at 65 mm. I was going to leave the CG there and experiment to see if she prefers more or less rudder.

              She did nose up a little with the flaps so we put in a little nose down elevator in the flap mix and she landed pretty nicely.

              Dan

              Comment


              • ingrahal
                ingrahal commented
                Editing a comment
                Hi Dan, I haven't even unloaded the truck from yesterday yet but I'll get a measurement and let you know where we ended up. Sounds like you need to add about an ounce or maybe a half ounce to the nose.
                Last edited by ingrahal; 06-19-2016, 03:09 PM.

            • #25
              The sweet spot is definitely 65 mm on this plane. We started at 60 mm which was nose heavy, removed 2 oz. which put it at 65 mm and it flew great, removed 1 oz. more putting it at 70 mm and got some scary stalls going into turns.

              Comment


              • #26
                Here are the videos of the first three flights. You've got to give the crazy tow pilot a break, he only flies once every 6 months or so. He's a good son though and doesn't hesitate whenever I ask him to help out.

                These are the raw clips so you should skip to 11:30 on the first one.


                I was having a hard time seeing the plane against a hazy sky so I released early on this one.


                This one was with the CG at 65 mm and it flew great. I even found a little lift.

                Comment


                • #27
                  Art, looks like y'all have a nice sailplane there! Congrats on the successful flights!

                  Comment


                  • #28
                    Congratulations on the maiden!

                    Comment


                    • #29
                      Thanks fellas!!! I'm still waiting for some still photos and maybe some more video.

                      Comment


                      • #30
                        Here is some more video and some pics.


                        Click image for larger version

Name:	640P1010680aresize.jpg
Views:	361
Size:	158.0 KB
ID:	10945
                        Click image for larger version

Name:	640P1010681aresize.jpg
Views:	358
Size:	151.7 KB
ID:	10946
                        Click image for larger version

Name:	640P1010688aresize.jpg
Views:	360
Size:	198.7 KB
ID:	10947

                        Comment

                        Working...
                        X