Announcement

Collapse
No announcement yet.

Aeroworks 40% Carbon Cub Users Thread

Collapse
X
 
  • Filter
  • Time
  • Show
Clear All
new posts

  • #16
    I'm back to work on the Carbon Cub. I haven't had a chance to work on it for the past week or so with the new job.

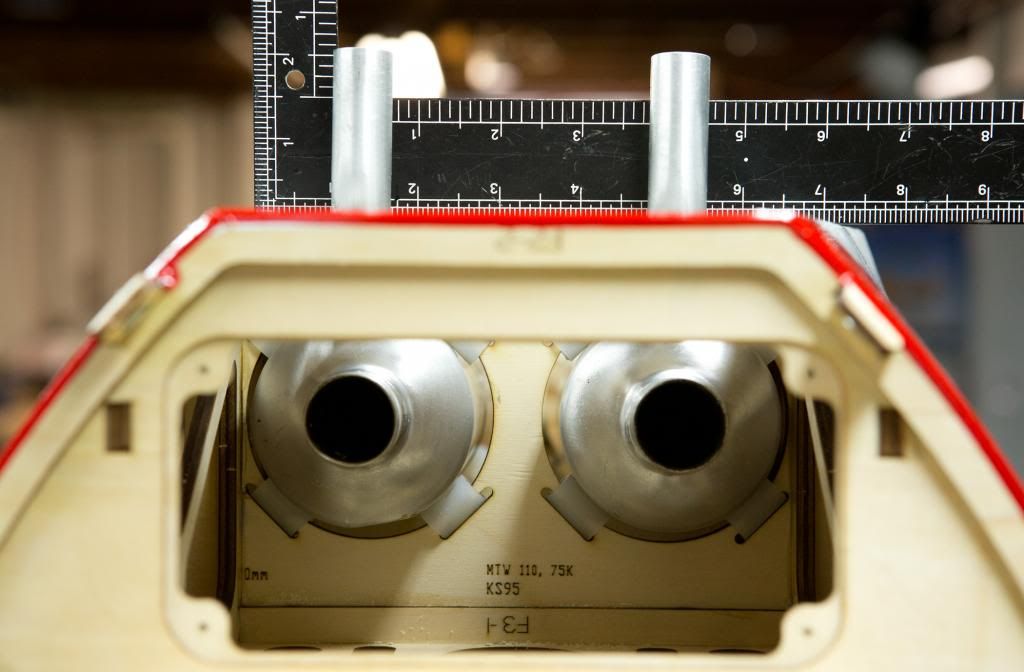
    I have all the parts all set for installing the headers and canisters. The ply plates that are part of the kit are designed for smaller canisters than will be used. I have the 70mm plates that I am modifying to install the larger canisters for the DA 150.

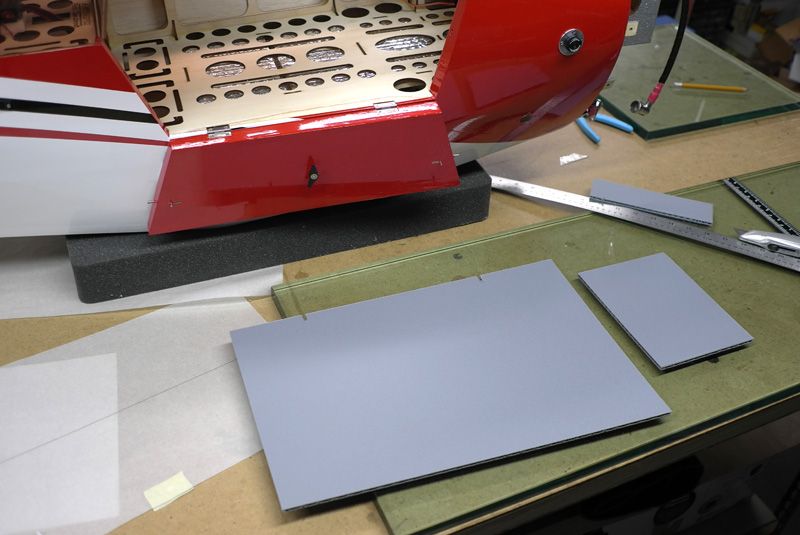
    There are a couple ways I can do this.......probably the easiest is to use the single canister ply plates and cut them down slightly on both sides, then install staggered on formers in the area where the exhaust system goes through inside the fuselage. One plate would be on the front of the former on the right side and the other plate will be on the back of the former on the left side. A bit of slow setting resin to keep them in place and it should make for an excellent way of holding the pair of canisters in place.

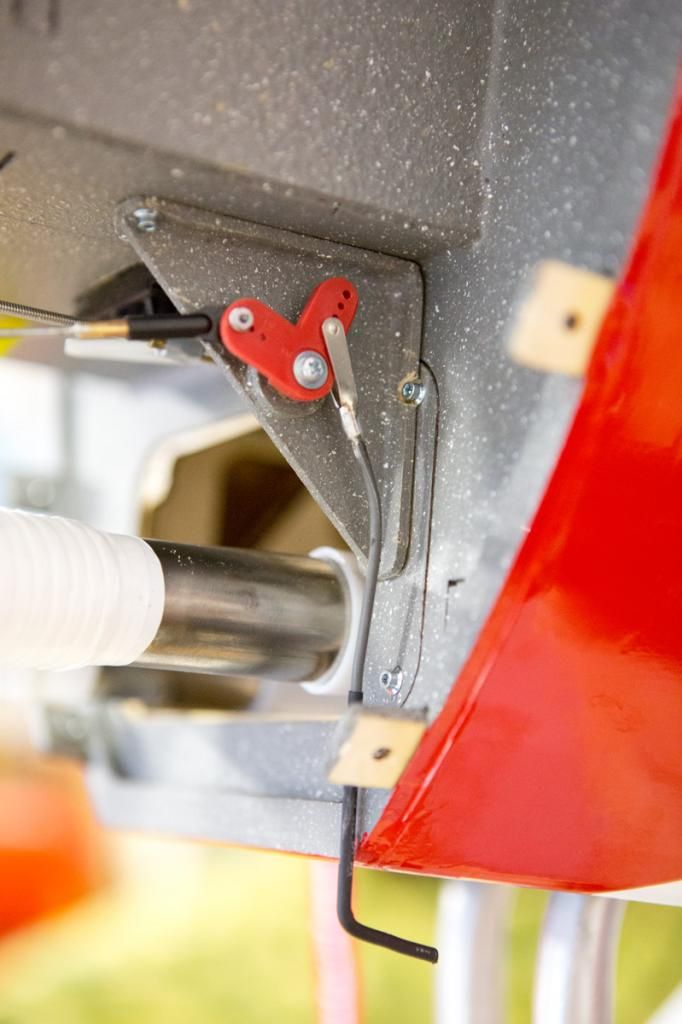
    I'll use 2 mounts per canister to keep things from moving around or causing a break in the headers (hopefully !).

    I have both front and rear dump MTW 110 canisters along with 70mm and 90mm drop flex headers. Right now it looks like the 90mm drop flex headers with the front dump canisters will be the best fit.

    A little trial and error and I'll have a better idea of what seems to work best.

    Photos and more details tomorrow after I get things sorted.

    Comment


    • #17
      for long term use and lack of aggravation, I would bail on the flex headers and go with the same type you have on the Bidule.

      Flex headers are going to break, its just a matter of when... And it always seems to be when you are using them?
      Len Buffinton
      Team Horizon Hobby

      Comment


      • #18
        Bob....I used two laser cut twin canister mounts from Chief RC. They were a little too wide and had to be trimmed on both sides.

        Last edited by Xroadie; 11-16-2016, 02:25 PM.

        Comment


        • #19
          Pete, exactly what I was thinking. I picked up both the single and double mounts to see how they will fit.

          I'll put 2 mounts in place for each canister, a front and a back. Hopefully that will keep the canisters from shifting very much and putting stress on the flex headers.

          I was thinking of using the laser cut mount as a guide and then making my own specific to the size in the front and back.....5" x 7" for the front mount and 5.5" x 7" for the rear mount, then I can space the canisters evenly between the walls of the fuselage and each other.

          Yours looks much easier and since there is spacing between the sides of the fuselage and where the outside of the canisters are it would be a much simpler and faster solution.

          Quick question for you....did you find the 90mm or the 70mm headers worked better with this set up ?

          I'll work in it a bit here and then post some pictures.

          Comment


          • #20
            Originally posted by BobM View Post
            Quick question for you....did you find the 90mm or the 70mm headers worked better with this set up ?
            Bob,

            I used 90mm

            Pete

            Comment


            • #21
              Looks about right. I was able to cut down 2 double mounts to a total width of 7".....they seem to fit very well.

              A little work to set up some tri stock in a couple spots and it should be all set here.

              Comment


              • #22
                Ok, another question for Len and Pete.....The engine requires 2 servos, choke and throttle. Did you decide to mount them on the engine box inside the cowl or to put them on mounts inside the fuselage behind the firewall ?

                My concern is the engine box will have the highest amount of vibration and possible issues for causing a failure of the servos, if I mount them a bit farther away they have less vibration possibly.

                Not sure if there is that much difference between a couple inches one way or the other though.

                Bob

                Comment


                • #23
                  Mounted mine to the motor box. Simple and clean
                  Len Buffinton
                  Team Horizon Hobby

                  Comment


                  • #24
                    I mounted my throttle servo on the box and have a mechanical choke...I'm a big fan of "Rube Goldberg"

                    Last edited by Xroadie; 11-16-2016, 02:27 PM.

                    Comment


                    • #25
                      Sounds good.....easy way to mount them so the links are short and direct. I'll use a servo for the choke.....makes it easy to access it right on the transmitter and also link it to my failsafe (along with the ignition cut off) to help make sure the engine is absolutely shut off should I lose radio for any reason.

                      Pete, I like the insulation you used for the inside of the canister area....great idea to keep the heat from going up into the cabin. I'll probably do something like that on mine and then have a layer of balsa for the cabin floor to further insulate the cabin area.

                      Len told me about that balsa layer and then also making a floor the gas tanks sit on that is raised about 1/4" or so, give or take. This gives a channel between the tank floor and the cabin floor to help insulate as well as let wiring have a run area.

                      Many thanks for all the help........I'm certain I will have a few more questions as I go along here.

                      Bob
                      Last edited by BobM; 09-13-2015, 04:03 PM.

                      Comment


                      • #26
                        Bob, the insulation has worked great, I did tests on it before I installed it and it has held up to the heat with out any problems. Lens use of a balsa floor works great, you should do it. I was going to use some thin aircraft ply to lay on the floor under the gas tank when something leaning up against the wall in my garage caught my eye

                        My Mercedes van, was a plain cargo van when I bought it. It came with heavy duty corrugated plastic panels that covered the interior walls. I removed two of the interior panels when I had windows put in. The stuff looks like corrugated yard sign material, but it's 100 times stronger. You can stomp on it and not dent it. I used a few pieces in my cockpit. It's about 1/4" thick, is gray in color and has a nice textured surface. It cuts cleanly with a utility knife and is easily drilled. It must be made by MB Germany or they have it made for them, as all my attempts to find it online have been in vain.

                        I used a piece under the main tank, another in front of that to hold the header tank, one for the left inside of the cockpit and a fourth for the aft turtle deck that would be my radio gear tray. Here's a few pics from one of the old threads.


                        ​
                        Last edited by Xroadie; 09-15-2015, 03:05 AM.

                        Comment


                        • #27
                          Hers a story board of the pics I used in the original thread.
                          Carbon Cub Build Story by Peter George (xroadie). 53 photos.

                          Comment


                          • #28
                            Hi Pete.....many thanks for the pictures and the link to the whole photo series.........very helpful. Seeing visuals makes a lot of the details and construction much easier.

                            Trying to get back on track with my build, but having to get work and prep done for my new teaching position has taken top priority the last few weeks.

                            Hoping to have the build completed in a week or so after getting back from the SeptemberSoar in Vermont this coming weekend.

                            I'll post new pictures this week showing my canister and exhaust installation.....before Friday.

                            Comment


                            • #29
                              I upgraded the springs on my landing gear shocks....it was a pretty easy fix and now the landing gear doesn't squat down, when sitting in the pits. I wish there was a way to add stiffer axels to the gear struts!

                              BTW....mine came from the factory with toe-out set in the axels, which does not help ground handling, it also caused the gear to squat down when rolling forward, which was compounded by the soft springs, and rise up when backing up the model. My initial fix was to slightly elongate the bolt holes, in the rear-gear strut mounts to give them a wider stance and allow the wheels to swing out of toe-out, but to get a little toe-in, which I prefer I had to bend the axels a bit.

                              Pete
                              Last edited by Xroadie; 10-11-2015, 03:23 PM.

                              Comment


                              • #30
                                Working on the Carbon Cub just got a lot easier

                                Comment

                                Working...
                                X