Announcement

Collapse
No announcement yet.

Choco Fly SB 14 6m Build Thread

Collapse
X
 
  • Filter
  • Time
  • Show
Clear All
new posts

  • Choco Fly SB 14 6m Build Thread

    In the fall of 2021 I learned that Rosenthal Models USA https://rosenthalmodelsusa.comhad a 6m Choco Fly SB 14 on order that was not spoken for, so I put my name on it. More information about the full-scale SB 14 can be found here (use google translate for both pages).


    And also a link to the Choco Fly website. Scroll down to find the 6m SB 14.

    Wir bieten dem ambitionierten Scale Segler-Piloten eine durchdachte Modellpalette, welche für jeden Einsatzzweck ein optimal ausgelegtes Flugzeug bietet. Von GPS-Racing bis hin zum Classic Oldie haben wir Dank modernsten Fertigungstechnologien, von Voll-Carbon Sandwich Bauweise bis hin zum klassischen Rippenbau, alles dabei.


    My glider was ordered with the canopy installed with latch, complete seat tray, Ceflix retract installed, tailwheel installed, instrument pod and detailed instrument panel, wing and fuselage bags and red trim.
    The SB 14 is a GPS racer so there is a lot of carbon in the wings and fuse. The wings are beautifully molded and are of top quality. Each side of the wing has one flap and two ailerons. There are no spoilers in order to keep the airfoil as clean as possible, and the flaps are large enough to ensure good glide path control using crow/butterfly. The fuse is carbon from the back of the canopy to the tail. There is some Kevlar in the nose and in the wing/landing gear area. Also very nicely molded. The insides of all the components are clean and neat, much like the inside of a premium acoustic guitar.
    I'm going to install a Torcman FES system in the nose fed by a yet-to-be-determined ESC and use ChocoMotion Fox servos. The ChocoMotion servos, generally speaking, cost a bit more than KST and are a bit less than MKS servos. In some sizes they are more powerful than the other brands, and some are the same size and can be used as replacements for KST or MKS. As all of these components are installed I will describe each specific item in more detail. Fortunately, Rosenthal Models USA (aka Bruce DeVisser) carries Torcman FES systems and Fox servos, plus all the accessories needed to get this bird in the air. Things like cockpit details, aerotow releases, fuselage side mounts for servos, battery boxes, LDS/IDS servo drives, and a beautiful and very scale removable Prandtl probe for pitot/static. In addition to carrying models from Choco Fly, he is also a dealer for Tomahawk Aviation, Rosenthal Models, Florian Shambeck, LeoMotion motors and Torcman e-machines.
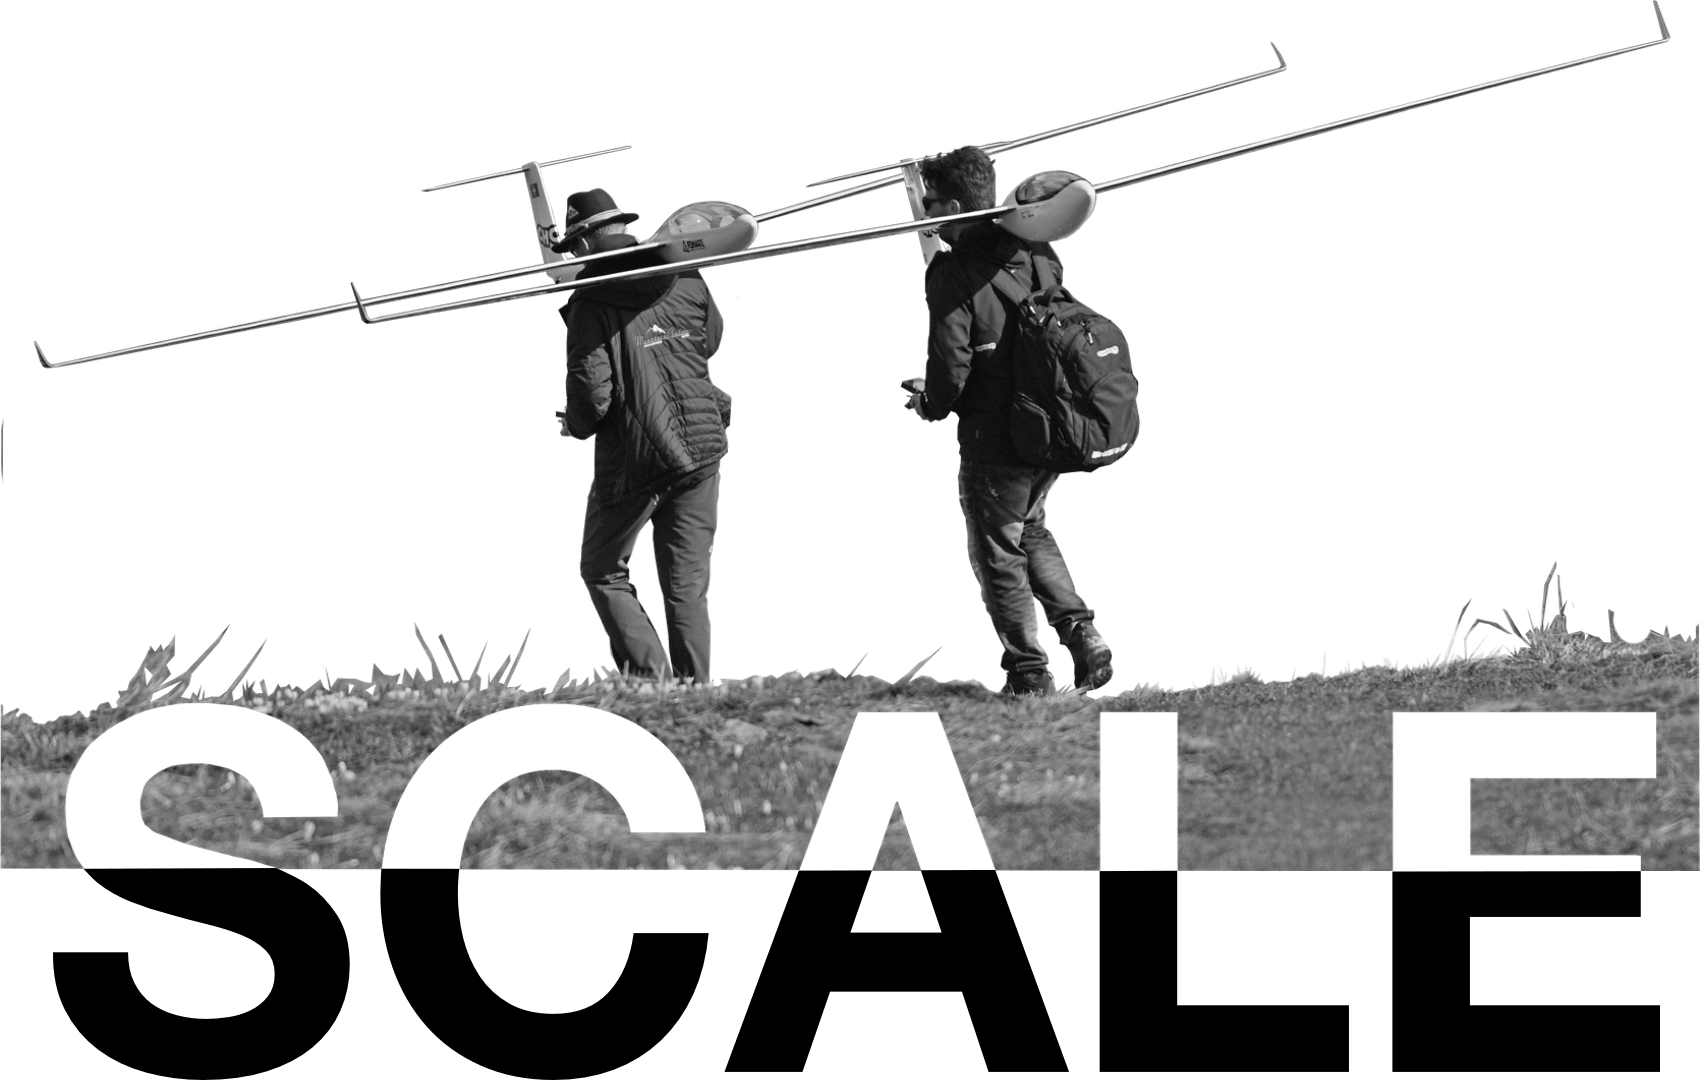
    After unpacking and finding everything present and with no signs of damage, it is time to put it together! Surprisingly, everything fit together! The airframe weighs 18 lbs so it will probably be a good floater. There are ballast tubes in each wing so it can also be loaded up.
    I use Jeti avionics and will use a CB 220 for power management and short protection, two REX 12 receivers for primary and backup RX, a R3/RSW receiver switch to turn the plane on and off using the transmitter, a Mvario 2 and a Mspeed EX airspeed sensor.
    Here we go...

    Click image for larger version

Name:	inTheBags.jpg
Views:	876
Size:	104.1 KB
ID:	47754 Click image for larger version

Name:	nose.jpg
Views:	780
Size:	61.7 KB
ID:	47755 Click image for larger version

Name:	cockpitSeat.jpg
Views:	780
Size:	72.9 KB
ID:	47756 Click image for larger version

Name:	AirframeAssembled.jpg
Views:	783
Size:	47.9 KB
ID:	47757 Click image for larger version

Name:	Folder.jpg
Views:	780
Size:	114.6 KB
ID:	47758 Click image for larger version

Name:	IMG_0359.jpg
Views:	772
Size:	71.3 KB
ID:	47759 Click image for larger version

Name:	Gear.jpg
Views:	787
Size:	74.2 KB
ID:	47760 Click image for larger version

Name:	AirframeRsideCU.jpg
Views:	776
Size:	119.4 KB
ID:	47761 Click image for larger version

Name:	PodINpanel.jpg
Views:	794
Size:	113.3 KB
ID:	47762 Click image for larger version

Name:	AirframeRside.jpg
Views:	784
Size:	151.7 KB
ID:	47763 Click image for larger version

Name:	Hardware.jpg
Views:	774
Size:	60.1 KB
ID:	47764 Click image for larger version

Name:	baglables.jpg
Views:	787
Size:	145.1 KB
ID:	47765

  • #2
    Ohhhh, fresh new fiberglass!!!
    Len Buffinton
    Team Horizon Hobby

    Comment


    • #3
      looking forward to seeing her do some full runway high speed passes before landing! awesome!

      Matt

      Comment


      • #4
        I need to see some of these up close.

        Comment


        • #5
          Originally posted by N4088K View Post
          I need to see some of these up close.
          N4088K - On my PC laptop first I click on a picture, then click on it again and it zooms in, another click and it zooms in again, then the third click restores it to original size. Hope this works for you.
          Bill

          Comment


          • #6

            Originally posted by Soaranator View Post

            N4088K - On my PC laptop first I click on a picture, then click on it again and it zooms in, another click and it zooms in again, then the third click restores it to original size. Hope this works for you.
            Bill
            I was referring to “up close” as “in person”, I’m just getting into scale gliders, I’m trying to learn.

            Comment


            • #7
              Originally posted by N4088K View Post

              I was referring to “up close” as “in person”, I’m just getting into scale gliders, I’m trying to learn.
              I am working on it as fast as I can! I'll let you know when and where it will be flown when it is done.

              Comment


              • #8
                While waiting for the servos and motor parts to arrive, there are a few things to do. The fuselage has molded in recesses for using two MPX connectors stacked for each wing. I prefer DB 9 connectors, so I used modified each opening to accept a female DB 9 on each side. The connectors in the wing will be loose so that if the plane is in a mid-air or contacts an object on the ground it will not come unplugged.

                Next, I opened up the servo openings, and after opening up the flap bays I noticed a tube inside the wing. It is a ballast tube. Kind of a pleasant surprise since there is no mention of this glider having any, nor are there any openings in the wing roots. When I open up the wing roots for the male DB 9 connectors I'll open these up also.

                On to the wiring harnesses. I cut each wire about 8” too long and crimped a JR style connector on end of each one for easy replacement in the field. Roscoe the cat always seems to show up for an inspection visit when the workbench is covered with tiny parts during the crimping process... I laid the wires on the wings using them as a jig to create the harnesses. I used heat shrink tubing to hold the wires together. Again, everything at this stage is too long – I want to make sure there is enough slack to get the connectors out of the wing far enough to easily replace each servo. After all the servos and respective drives are installed, I'll slide the harnesses in place and add the male DB9 connectors. I'll custom make the fuselage side of the harnesses in the last phase of construction when all the components (batteries, ESC, motor, tow release) are on hand and/or installed to make sure everything fits under the seat pan and the CG is close.

                The rudder needed to be mounted to the fin post, so I used some G10 sheet to make the hinges. The rudder itself was pre-slotted, so where they would go in the rudder post was already decided for me. The top on was pretty easy – an oversized slot for the G10 hinge was made in the rudder post with the dremel. The bottom one is pretty close to where the rudder pushrod is. The carbon pushrod is pre-installed and already has a threaded coupler on it and is lined up with the fairings. There is also another tube laminated into the fuse to run the servo wire from the cockpit to the tail. Hopefully there will be enough room in there for the pitot/static tubing – we'll find out soon enough. There is an existing plywood former at the bottom of the fin that I notched for the G10 hinge so the top of the hinge would be flush with the bulkhead. Then, another piece of plywood was used to capture the top of the lower rudder hinge.

                I tacked both hinges in place with 15 minute epoxy and held the rudder in place with blue tape. After the epoxy cured, I used a syringe with a to inject West Systems epoxy into all voids. I thickened the epoxy with graphite/carbon powder. This mix is very shiny and was photographed after it cured - it is really strong and a thick mix of this sticks to everything and it is impossible to get it all off. Extreme caution is needed using this on an all white airframe.

                The hinge pins are temporarily 1/16” music wire and will be replaced with larger diameter wire when that becomes available.

                In addition to using gloves when working with epoxy, working with carbon fiber and carbon powder also present hazards. We really do not want to breathe any of the graphite/carbon powder dust or any dust made from sanding or grinding carbon fiber. Fortunately, the recent epidemic has provided me with plenty of options for readily available masks that filter out very small particles. Graphite/carbon powder is really nasty stuff to work with. For a really good description of what can possibly go wrong, go to Amazon.com and look up “Pure Graphite Powder”. Scroll down and read the first review by Mr. Crunchy for a good idea of how quickly this stuff can get out of control.

                Also in my shop, I have made two hospital quality air filters. I bought two 20” square fans and bought 20” X 20” MERV 13 rated furnace filters for them. I simply tape (more blue tape) the filter in the intake side of the fan paying attention to the airflow arrow on the filter. I leave them on low all the time and they collect a surprising amount of airborne particles.

                Next up – wing servos and drives.
                Click image for larger version

Name:	a FuseConnectorCU.jpg
Views:	496
Size:	61.8 KB
ID:	47835 Click image for larger version

Name:	a DB9.jpg
Views:	438
Size:	62.4 KB
ID:	47836

                Comment


                • #9
                  Wiring Harness.

                  Click image for larger version

Name:	b Servo opening 1.jpg
Views:	444
Size:	31.0 KB
ID:	47839 Click image for larger version

Name:	b ServoOpening 2.jpg
Views:	485
Size:	55.7 KB
ID:	47838 Click image for larger version

Name:	b ServoOpenings3.jpg
Views:	432
Size:	28.7 KB
ID:	47840 Click image for larger version

Name:	b WingHarness1.jpg
Views:	436
Size:	61.5 KB
ID:	47842 Click image for larger version

Name:	b WingHarness2.jpg
Views:	427
Size:	51.5 KB
ID:	47844 Click image for larger version

Name:	b WingHarness3.jpg
Views:	433
Size:	43.5 KB
ID:	47841 Click image for larger version

Name:	b WingHarness4.jpg
Views:	439
Size:	51.0 KB
ID:	47843

                  Comment


                  • #10
                    Rudder install pics.


                    Click image for larger version

Name:	1 RudderHingePin.jpg
Views:	443
Size:	127.6 KB
ID:	47850 Click image for larger version

Name:	2 RuddHingePrep.jpg
Views:	438
Size:	164.5 KB
ID:	47857 Click image for larger version

Name:	3 RudderTopHinge.jpg
Views:	443
Size:	46.3 KB
ID:	47851 Click image for larger version

Name:	4a RuddBottomHingeLoc.jpg
Views:	436
Size:	41.2 KB
ID:	47848 Click image for larger version

Name:	6 RuddBotHingebrace.jpg
Views:	435
Size:	64.8 KB
ID:	47853 Click image for larger version

Name:	7 RuddTopFit.jpg
Views:	437
Size:	66.2 KB
ID:	47849 Click image for larger version

Name:	8 LowerHingefilled.jpg
Views:	425
Size:	71.2 KB
ID:	47847 Click image for larger version

Name:	9 Upperhingefilled.jpg
Views:	484
Size:	56.9 KB
ID:	47846 Click image for larger version

Name:	10 RudderLeft.jpg
Views:	431
Size:	75.9 KB
ID:	47852 Click image for larger version

Name:	11 Rudderright.jpg
Views:	438
Size:	84.1 KB
ID:	47856 Click image for larger version

Name:	12 RudderZero.jpg
Views:	419
Size:	57.2 KB
ID:	47854 Click image for larger version

Name:	13 Merv13fan.jpg
Views:	448
Size:	71.7 KB
ID:	47855

                    Comment


                    • #11
                      Thanks for the detailed pictures, it helps a lot. I’ll bring the coffee for shop time.

                      Comment


                      • #12
                        A box arrived from Rosenthal Models USA full of the servos along with most everything else needed to finish this glider. The servos are ChocoMotion Fox High Voltage servos, and they are named by their width and output. For instance a Fox 10/10 is 10mm wide and has an ouput of 10kg. All of the servos I received are in anodized aluminum cases that have edges, corners and accents milled after anodization giving a shiny aluminum accent to the cases. In addition to the awesome ChocoMotion Fox servos, Bruce at Rosenthal Models USA carries Servorahmen drive systems and aluminum servo horns of various sizes for flaps, inner and outer ailerons – there are no spoilers on this glider. From Florian Schambeck. a beautiful aero tow release, a Prandtl probe (provides pitot and static) with mount and fuselage side servo mount for the rudder servo. I decided to go with the Torcman motor system including removable propellor yoke with 16x10 blades, forward mounting ring with bearing, rear mounting ring with bearing and NT530-28-Z | 14pol |13W motor. Bruce also has a lot of accessories, bits and little pieces that I didn't know I needed. If I forgot to mention anything, I will when I install it.
                        Before moving on to putting the servos in the wing, there was some work to finishing up the aft end of the fuse and the retract. There is a thin plastic tube laminated into the fuse for running the servo wire to the elevator servo. I was able to run not only the servo wire but also the pitot and static lines in it as well. Nothing sticks to the tubing used for the pitot and static lines, so to to mark them I simply marked the ends with red or black magic markers. When the install is finished and these tubes are cut to final length, Schambeck provides heat shrink labels for pitot/static.
                        Installing the Fox 15/15 elevator in the pre-cut hole in the vertical fin was pretty straight forward and easy. After installing a fiberglass horn in the elevator, I made a carbon tube pushrod to drive the elevator.

                        Click image for larger version  Name:	01 PitotStaticMarked.jpg Views:	0 Size:	31.4 KB ID:	47907 Click image for larger version  Name:	1 wiringTube.jpg Views:	0 Size:	109.8 KB ID:	47905 Click image for larger version  Name:	2 ElevatorHorn.jpg Views:	0 Size:	73.4 KB ID:	47904 Click image for larger version  Name:	3 ElevatorServo.jpg Views:	0 Size:	54.0 KB ID:	47901 Click image for larger version  Name:	4 Pushrod1.jpg Views:	0 Size:	203.8 KB ID:	47906 Click image for larger version  Name:	5 Pushrod2.jpg Views:	0 Size:	67.9 KB ID:	47903 Click image for larger version  Name:	2 ElevatorHorn.jpg Views:	0 Size:	73.4 KB ID:	47908
                        Attached Files

                        Comment


                        • #13
                          The Prandtl tube mount turned out to be pretty easy in spite of the limited space in the narrow fin and lack of access to the area where the mount goes. I carefully drilled a 6mm hole (in small steps) about 1/3 of the fin height down from the top of the fin. The mold line on this fuse is right on the centerline which made locating and centering the probe and mount easier. I fished the pitot/static lines up and out of the fin thru the opening for the elevator drive at the aft end of the top of the fin. I apologize for no pictures of this procedure as each step took two hands. I then attached the lines to the mount and used some tweezers to grab the front of the mount and feed it into the fin opening while pulling the pitot/static lines from the bottom of the fin to pull the mount into the fin. The opening at the top rear of the fin is too small for a source of light, a tool and line of sight all at once, so I taped a LED flashlight on the forward stab mount hole on top of the fin to provide some light inside the fin as the all carbon structure is really dark inside! Next, I cut one end off of a q-tip and slid it in some 1/8” ID or so brass tubing leaving the other cotton end sticking out. I wrapped a bit of blue tape around the q-tip shaft to make it a snug fit in the tube. The cotton end of the q-tip fits nicely into the Prandtl mount after turning it between my fingertips – it fits just tightly enough to pull the mount into its' final position. Now I slid the brass tube, q-tip end first into the fin. I was using the tweezers to hold the back of the mount against the front of the rudder post while with my other hand slid the q-tip into the front of the mount. Carefully, I used the brass tube/q-tip to pull the mount forward carefully, and guide it into the hole after removing the tweezers. To push the mount all the way into the hole, I used a 3/8” id brass tube to engage the hub at the back of the mount and push it into place. Once in place the q-tip is removed and while still pushing on the 3/8” tube, the Prandtl tube is inserted using a turning motion into the mount. I was surprised at how quickly this all went and how easy it was.
                          I used my Robart incidence meter to jig the fuse with the wing at +1 degree and a spirit level taped to the Prandtl probe to get the probe level. Most of the time the angle of attack of the wing will be pretty low and the idea is to have the probe as close to zero angle of attack as possible. Again, the seam lines of the fuse helped align the probe longitudinally and eyeballing it from many different angles was easy with the fuse seams for reference. Once aligned, I very carefully put a drop of CA between the mount and the fuse to tack it into place.
                          Next, I took the fuse to the stairs in the basement and leaned it onto a step so that the leading edge of the fin was level on the step. Then, I took a syringe full of thickened epoxy with a 3/32” heat shrink tubing nozzle extender and applied epoxy to the top, bottom and sides of the probe mount and let it cure. The epoxy was thick enough to basically stay in place but thin enough to flow out smooth. If you have never used a syringe to apply epoxy, it is surprising how well even thick epoxy flows.
                          The last step was to mount a couple of tubing mount clips (also from Rosenthal Models USA) to keep the pitot/static lines out of trouble. Easy to install – figure out where the lines need restraint, cut a couple loops off the strip, hold with tweezers and CA in place. After the CA kicks, press the tubing into place. Done.

                          Click image for larger version

Name:	1 Centerline.jpg
Views:	410
Size:	42.1 KB
ID:	47912 Click image for larger version

Name:	1b tubesoutTopFin.jpg
Views:	389
Size:	112.9 KB
ID:	47914 Click image for larger version

Name:	2 probeLocationmark.jpg
Views:	500
Size:	68.5 KB
ID:	47910 Click image for larger version

Name:	3 ProbeFin.jpg
Views:	396
Size:	59.1 KB
ID:	47911 Click image for larger version

Name:	4 ProbeFin2.jpg
Views:	395
Size:	33.2 KB
ID:	47915 Click image for larger version

Name:	5 probeLevel.jpg
Views:	395
Size:	114.5 KB
ID:	47918 Click image for larger version

Name:	6 ProbeOperation2.jpg
Views:	400
Size:	153.4 KB
ID:	47916 Click image for larger version

Name:	7 Probetools.jpg
Views:	405
Size:	379.3 KB
ID:	47917 Click image for larger version

Name:	8 ProbeOperation.jpg
Views:	392
Size:	111.4 KB
ID:	47913

                          Comment


                          • #14
                            More pics and I forgot a pic of the probe mount... Click image for larger version

Name:	9 syringe1.jpg
Views:	391
Size:	171.8 KB
ID:	47925 Click image for larger version

Name:	10 syringe2.jpg
Views:	384
Size:	322.4 KB
ID:	47927 Click image for larger version

Name:	11 FinStairs2.jpg
Views:	394
Size:	67.0 KB
ID:	47926 Click image for larger version

Name:	12 fintubingclips1.jpg
Views:	393
Size:	63.3 KB
ID:	47924 Click image for larger version

Name:	13 fintubingclips2.jpg
Views:	386
Size:	55.5 KB
ID:	47923 Click image for larger version

Name:	14 TailwheelTubing1.jpg
Views:	387
Size:	39.6 KB
ID:	47922 Click image for larger version

Name:	15 tailwheeltubing2.jpg
Views:	388
Size:	63.6 KB
ID:	47921 Click image for larger version

Name:	16 ProbeMount.jpg
Views:	481
Size:	44.0 KB
ID:	47920

                            Comment


                            • #15
                              I'll be using ChocoMotion Fox servos in this model. The servos all have aluminum cases, nicely anodized with edges milled to reveal natural aluminum. The servos are named by their width and torque – a 10/10 servo is 10mm wide with a 10kg output. I'm a bit confused by the output not having a linear measurement to accompany the weight specification, but I can tell you the mid size (HV 15/22) and larger servos are very powerful, so make sure linkages and fingers are in their correct positions when turning the servos on!

                              The wings on this model were molded with small fairings on the upper surface (wing and control surface) for flaps and inner ailerons. The tip ailerons are fully internal. No control horns were installed at the factory so I decided to use Servorahmen IDS components for all 6 control surfaces. I also got aluminum servo horns from Rosenthal Models USA. I apologize in advance for not taking many pictures, but I barely had enough hands and fingers for installing the drives, much less taking pictures!

                              Here is a video from Servorahmen that can be used as a general guide - https://www.youtube.com/watch?v=cogNzvuLbm0

                              Basically, the things to bear in mind when selecting the servo horn, pushrod and control surface horn are:

                              1. Choose servo horn and and control surface horns that use full servo travel to get full control surface deflection – the surfaces will have better resolution. Make sure everything will fit under the servo cover.
                              1. Use the length of pushrod that puts the servo in the middle of the wing opening when the servo is at neutral so the servo can be replaced easily if needed.
                              2. This all sounds pretty simple and easy, but needs to be done with the servo plugged in and turned on. Without anything epoxied in place it is a real challenge to observe or guesstimate the range of motion of all the gizmology and make sure nothing binds.

                              This all required me to assemble each servo/servo frame/IDS in place and not do anything until all the correct components were selected. Then, I started by tacking the control surface horns very carefully with CA and then carefully checking that it was still in the correct position. Next, using a blunt tip 50ml syringe filled with West Systems epoxy thickened with graphite powder, I carefully potted the control surface horns. I did both flaps simultaneously to save time.

                              Since the flaps are the primary glidepath control for this plane, it is important to have the flaps go down as much as possible. I temporarily programmed my radio so the flaps are activated by a 2-position switch, with down flap (+) travel set at 100% and up travel (-) set to 80%. With the servo in the “up” position, I taped the flaps at zero and centered the flap servo in its' mount. (Later I will program the flaps with butterfly and flight modes, and the extra 20% of up travel that is not used will be used for speed mode programming.) I am getting 90 degrees of flaps (+) with this setup. With everything turned on and while holding the flap servo mount in the centered position, once again I checked the operation for range and binding. With everything working satisfactorily, I carefully tacked the servo mount in place with a bit of medium CA at each corner and hit it with kicker. Then, I checked it again carefully. Satisfied that everything was in the right place and working properly, I shut down the radio and removed the servos. Using West Systems/graphite powder in a syringe, I epoxied the servo frames in place being careful to encapsulate the outside edges of the servo frames and also the keep epoxy out of areas that will be occupied by the servos. Next, the servos were replaced and checked for fit and proper operation.

                              The inner aileron servos were next using the ChocoMotion Fox HV 10/10 servos. Basically the same procedure as the flaps for installing the IDS, except the servos are centered. The servos I received are the “Plug Series” and have a relatively large connector that plugs into the servo, with a JR style connector at the other end. Servos with standard leads and JR plugs are also available. With everything mocked up in place, the “Plugs” were pinching the servo wires between the end of the plug and the rear of the carbon spar. Not ideal. So, I filed slots 90 degrees to the end of the plug which provided the wires a place to exit the plug before any conflict with the spar.

                              The wingtip panels are rather short and thin – about 22” long and less than 10mm thick in the servo bay. ChocoMotion Fox HV 8/6 servos fit with a tiny bit of room to spare. The real problem was with the IDS. The Servorahmen set for the 8/6 servos uses an aluminum tube with molded end inserts for the pushrod. The aluminum tube barely fit the opening in the rear spar and did not provide enough clearance to accommodate the vertical rocking of the tube as the servo and control surface went thru their range of motion. I ended up “kit-bashing” the parts from the other two Servorahmen IDS sets to get things to work. I used the control surface horns from the Fox 15/22 set – these come with various offsets and the the ones with no offset were not used for the flaps and were perfect for the tip ailerons. Next, I used the pushrods from the Fox 10/10. They are much thinner than the aluminum tubing and use the same size servo drive pin, but the hole in the control surface end of the pushrod was 1mm and the horn uses a 1.5mm pin. Fortunately, the outside diameter of the pushrod and the control horn are the same diameter, so the larger hole still has plenty of material around it. This did take me a few days to figure out, but it came out perfectly.
                              Click image for larger version

Name:	1 Servos.jpg
Views:	336
Size:	229.6 KB
ID:	48026 Click image for larger version

Name:	2 Servos.jpg
Views:	341
Size:	123.3 KB
ID:	48019 Click image for larger version

Name:	3 servos.jpg
Views:	341
Size:	206.6 KB
ID:	48024 Click image for larger version

Name:	4 servos.jpg
Views:	334
Size:	98.9 KB
ID:	48016 Click image for larger version

Name:	5 servo.jpg
Views:	343
Size:	39.9 KB
ID:	48011 Click image for larger version

Name:	6 horn.jpg
Views:	339
Size:	48.2 KB
ID:	48017 Click image for larger version

Name:	7 horn.jpg
Views:	342
Size:	73.3 KB
ID:	48021 Click image for larger version

Name:	8 horn.jpg
Views:	453
Size:	50.2 KB
ID:	48010 Click image for larger version

Name:	9 A2.jpg
Views:	341
Size:	69.0 KB
ID:	48018 Click image for larger version

Name:	10 A2.jpg
Views:	340
Size:	128.0 KB
ID:	48025 Click image for larger version

Name:	11 A2.jpg
Views:	336
Size:	75.4 KB
ID:	48014 Click image for larger version

Name:	12 A2.jpg
Views:	343
Size:	142.7 KB
ID:	48015 Click image for larger version

Name:	13 A1.jpg
Views:	340
Size:	116.6 KB
ID:	48022 Click image for larger version

Name:	14 A1.jpg
Views:	338
Size:	178.9 KB
ID:	48023 Click image for larger version

Name:	15 A1.jpg
Views:	335
Size:	49.9 KB
ID:	48013 Click image for larger version

Name:	16 A1.jpg
Views:	330
Size:	54.3 KB
ID:	48012
                              Attached Files

                              Comment

                              Working...
                              X