Announcement

Collapse
No announcement yet.

Let's pull a canopy.

Collapse
X
 
  • Filter
  • Time
  • Show
Clear All
new posts

  • Let's pull a canopy.

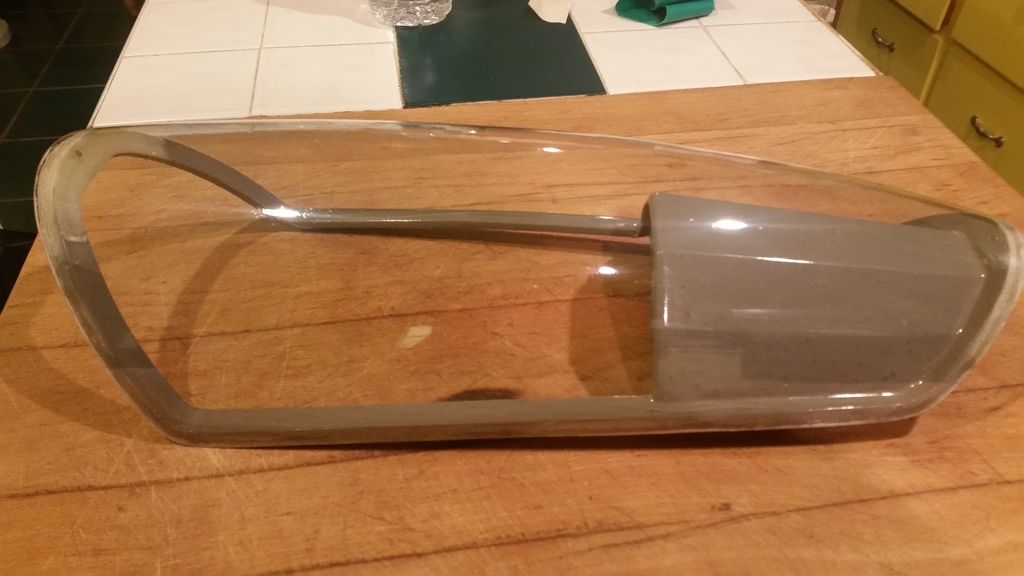
    My tremendous flying skills exhibited at this year's Horizon Aerotow left me in need of a replacement canopy for a 4.2m Discus 2b. The take away... always keep your finger on the tow release switch when taking off.

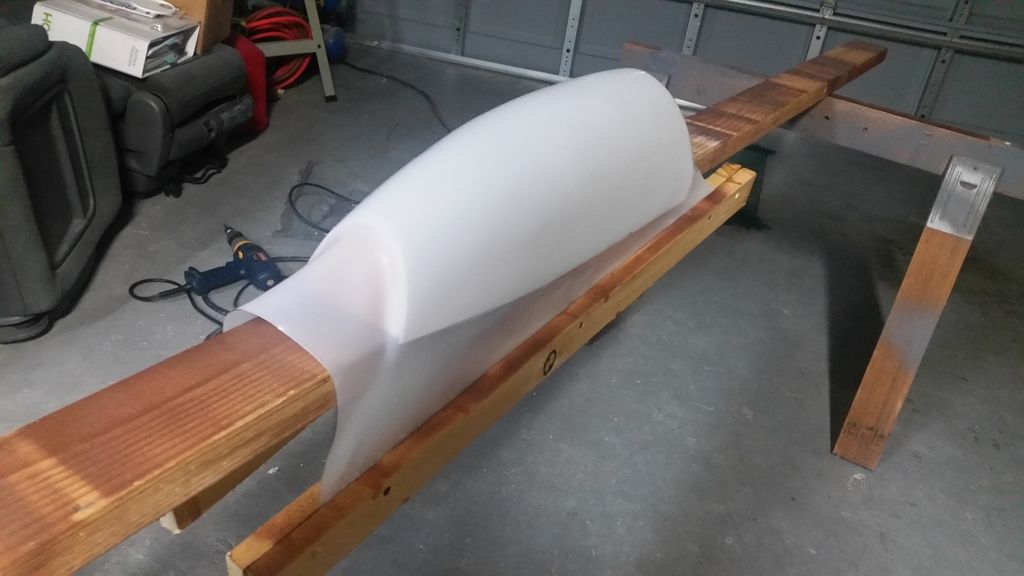
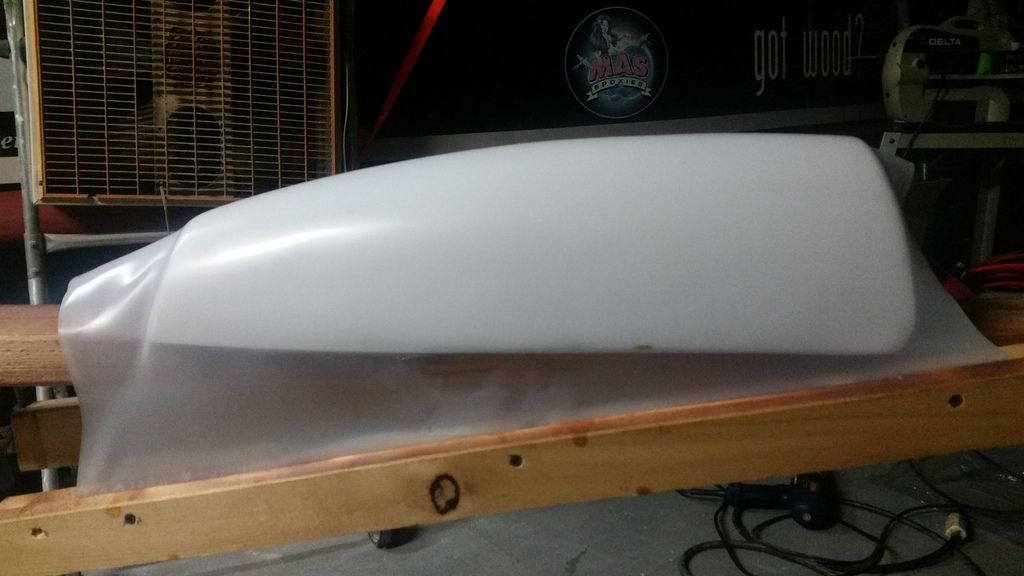
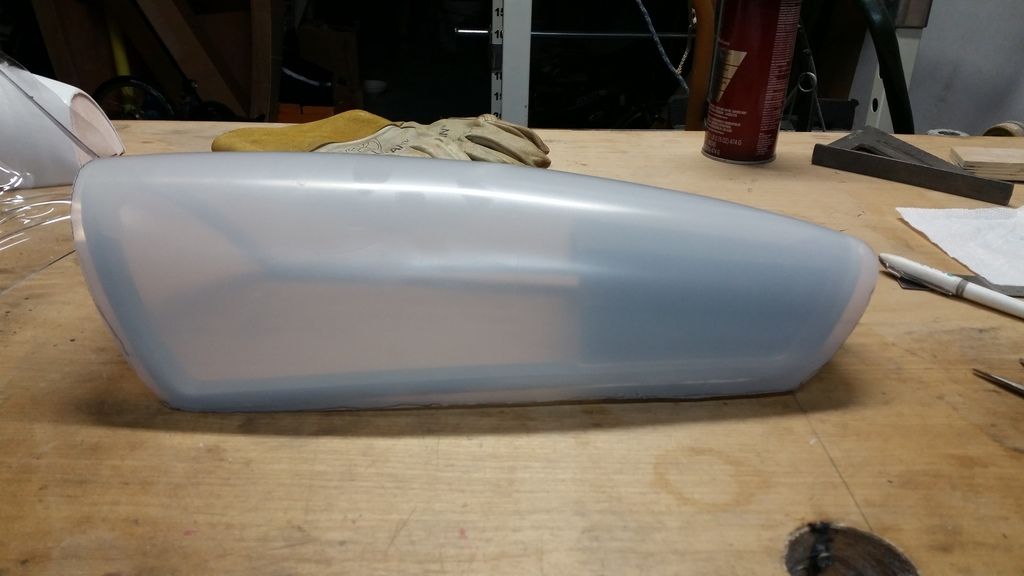
    The plug is carved from blue/pink foam. I got it close to final shape and then sanded the last bit down while it was in place on the fuselage. The pink sections were added so the pulled canopy can be trimmed to size.


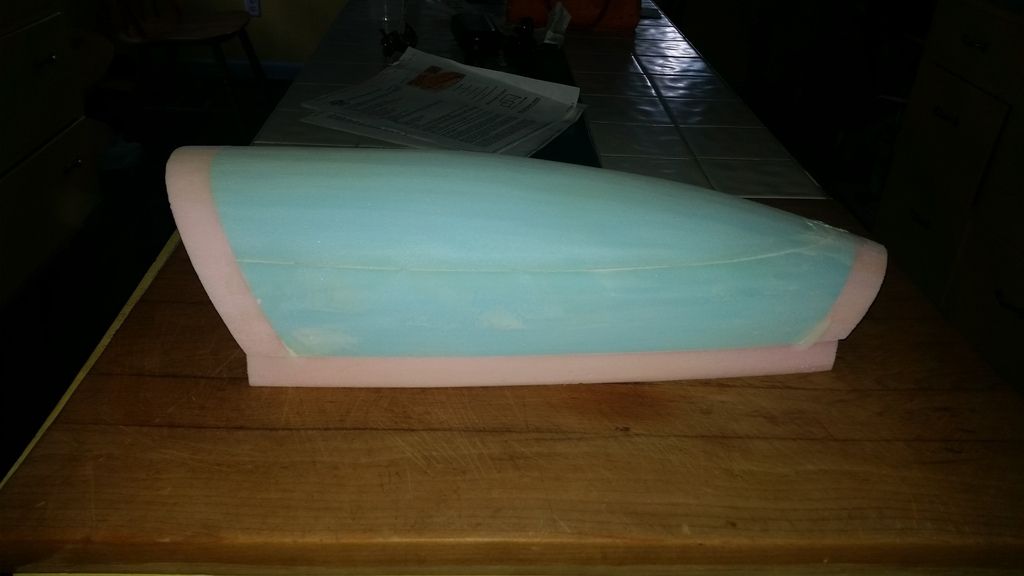
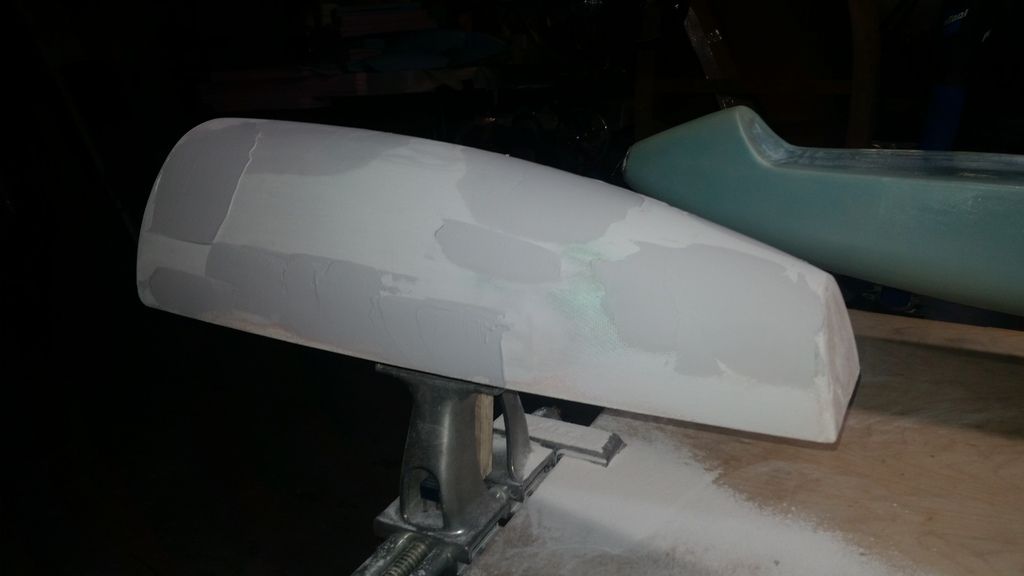
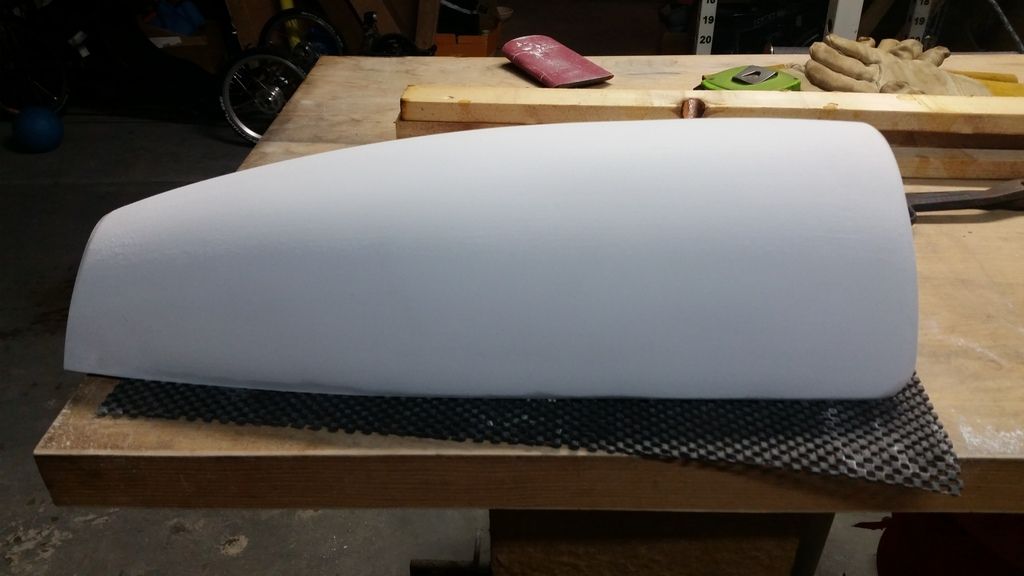
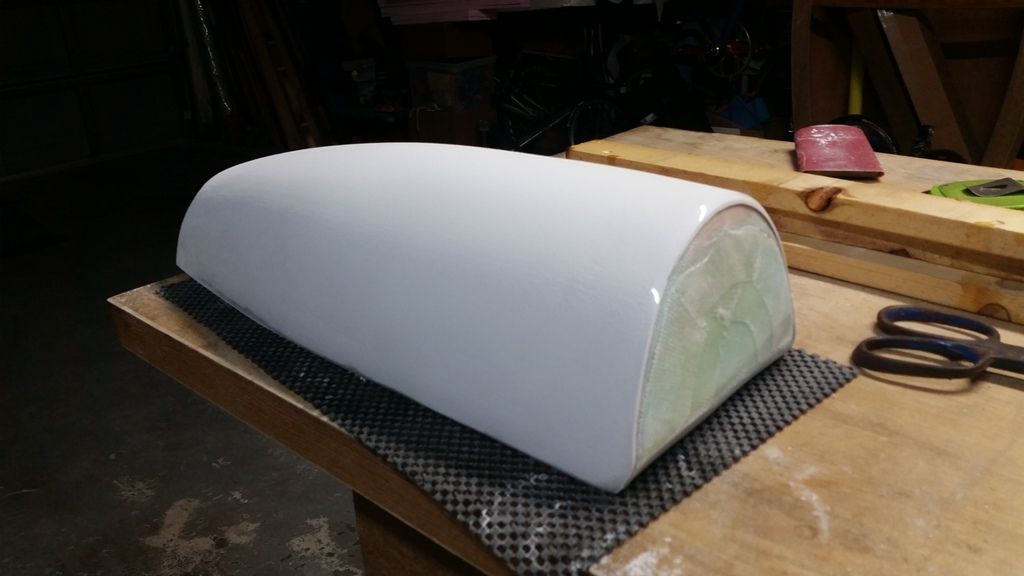
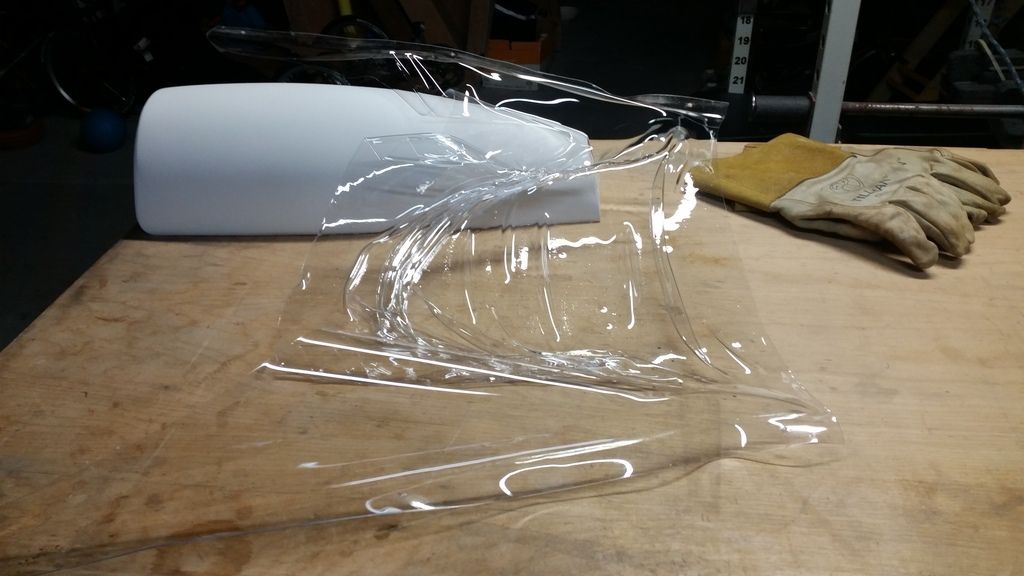
    Next step will be to cover it with two layers of 1.2 oz cloth then some bondo before sanding it smooth. The resulting plug will be used to pull some clear canopies.

    I read about one gentleman who used paper mache and wood filler for these steps under a coat of primer. I may have to give that a try in the future. I'm sure there will be a need for other canopies.

    He also mentioned wiping a little cooking oil on the plug before pulling the plastic canopy. The reduced friction provided an easier pull and more consistent thickness.

  • #2
    Wow, I guess I need to advertise again that I have some spare canopies for different models, I'm pretty sure I have several blue tinted canopies for a 3.5 scale Graupner Discus, they should easily fit a slightly smaller Discus as well.

    Really nice job on that plug though, I've done a few plugs and they are a lot of work.

    Comment


    • #3
      OK Dennis, I'm looking for Tinted Blue 40% Canopy for a Pilatus B4, you or anyone else have one, i'm interested!

      Jeremy and ben
      SCCAAA TT TN

      Comment


      • #4
        Looking for both canopies for 3.7m dg1000. About half way to getting one plug made. I'd like to see how you pull the canopy . Make a video.

        Comment


        • #5
          Here are some pictures showing the progress. The ends of the plug were extended and tapered in case I ever do try to use it with a vacuum .

          It was covered with 2 layers of 6oz, 1 layer of 2.47oz and one layer of 1.6oz cloth. After sanding the bondo was added, sanded, added, sanded etc. until I decided “close enough”.


          Vacuum? We don’t need no stinking vacuum! Two pieces of 1x2 were screwed together clamping each long edge of a sheet of .060” ABS plastic. This was heated and pulled down over the plug. Here it is after trimming.


          This shell was block sanded progressively from 80 to 400 grit.


          Next step is to similarly clamp the sheet of .040” PETG (Vivak), heat it and pull it down over the ABS shell. We’ll see how that goes.

          Thanks for following along.

          Comment


          • #6
            Super impressive
            Len Buffinton
            Team Horizon Hobby

            Comment


            • #7
              Len,

              Thanks for saying so but the first pull left something to be desired.

              My wife said it put her in mind of the Batmobile. Luckily she didn’t see it while it was on the bottom of her kiln. Much to my relief it wasn’t stuck but it had stretched all it was willing to.


              I will be buying a sheet of foil skinned insulation to make a hot box as it is more a question of “How much is it sagging?” than “What temperature is your oven?”

              If it were true you learn more from mistakes than success then I’d know about all there is to know by now. I make a lot of mistakes…

              The second one went much better. Here are two shots of it on the buck so you can get an idea how it was pulled.


              The best tip I stumbled across tonight was that you can leave the thin sheets of protective plastic that it comes with on until after you have formed it. That was great advice and explains the milky look. I’ll pull them off once I’m ready to glue it on.

              Here it is rough trimmed. You can see the frame inside.


              What glue is recommended for gluing it to the frame? I’ll paint white over the top to simulate the frame edge so the glue won’t be visible.

              Comment


              • #8
                Thanks for the details, I will be following you shortly...

                What device are you using for heating Vivak and how do you judge you have reached the right temperature to pull the sheet over the plug?

                Last is it a specific type of vivak you are using, in order to not remove the protective material?

                Stephane
                Stéphane
                Horizon Hobby Team Member

                Comment


                • #9
                  Brent, the best adhesive for canopies is Zap-A-Dap-A-Goo, it is clear and if you apply to much, you can let it dry and score the excess with a knife and peel away with no etching of the material whatever you use. It stays flexible and can be removed by cutting the joint if need be. The Zap # is PT12.

                  Jeremy and Ben
                  SCCAAA TT TN

                  Comment


                  • French1
                    French1 commented
                    Editing a comment
                    Totally agree with Jeremy's

                    Best advice he ever gave me 😬

                • #10
                  I had to make a new canopy for an ASW 28. Fitting and gluing the first one of two canopies formed to the frame twisted the frame just a little but that's all it took to not fit the fuse. The second one I put the frame on the fuse and tack glued a back bone to the frame to stiffen it then fitted the canopy. That one fit like a glove. Good luck.
                  Jim
                  Last edited by jgallacher; 10-20-2016, 12:25 AM.

                  Comment


                  • #11
                    Stephane,

                    In this case I used my wife's pottery kiln because it sits right in my shop. I am going to build a hot box for future thermo-forming. The plan is to use a 3/4" thick sheet of foil faced foam sheathing from a DIY store. A 4' x 8' sheet is about $12 locally. If my math is correct I should be able to make a box just under 24"w x 48"l x 16"d from a single sheet and some duct tape.

                    Heat source could be a heat gun stuck in one end or light bulbs if you aren't in a big hurry. If you add a dimmer you could even regulate the heat from the bulbs.

                    Both the .060" (1.5mm) ABS and the .040" (1mm) PETG (trade name Vivak) responded well at an oven temperature of about 260deg F but temps up to 280 or so should be fine. On both I just watched until they sagged a lot. My sheets were about 16" wide and I waited for about 6 inches of sag.This part seems more art than science. You'll know if you didn't wait long enough because you won't be able to stretch the plastic over the buck. Just put them back in the oven, wait for more sag and try again. You want the oven/hot box close to the buck, in my case I had to walk about 15 feet without a problem and I did the pull alone. Get it out, over the buck and push it down in fairly short order. I also pushed the two sticks holding the plastic together under the supporting board to keep the plastic tight to the sides of the buck.

                    My guess is that any Vivak sheet you buy will come with the thin film to protect it. It is very similar to the film you find on both sides of a sheet of plexiglass.

                    I'd really like to try vacuforming fuselage halves for some scale stuff in the 2.5 to 3m span range. I spoke to a guy who used to do a lot of vacuforming and he told me there is another inexpensive plastic superior to ABS for the purpose. I need to try to get in touch to see what the material was. It would be a quick and cheap way to make some stuff for flying on my golf course. Once it is 50' away I wouldn't know it wasn't the good stuff.

                    Jeremy,

                    Thanks for the excellent suggestion, I picked some up on the way home this afternoon.

                    Take care,

                    Brent

                    Comment


                    • #12
                      brent, i have a couple to make. where can i get the material to make them. thanks Dan

                      Comment


                      • #13
                        Dan,

                        The .040" PETG (Vivak) came from Laird Plastics in Orlando. The .060" ABS is from Farco in Orlando. Also check Piedmont Plastics or do a web search for sheet plastics in your area.

                        Take care,

                        Brent

                        Comment


                        • #14
                          Glued and trimmed. Last step is to paint a white border where the canopy glues to the frame. I only pulled one but the buck is available if I end up needing more. The process of pulling one takes about 30 minutes.


                          This canopy measures just under 18" front to back.

                          What did I learn from this first canopy? Small low spots in the canopy plug didn't transfer as noticeably as I expected. That is good as it means the plug does not have to be perfect. My guess is that they would show up if you used a vacuum to pull it.

                          Smoothness of the plug on the other hand is very important. This is why doing the first pull and leaving a shell works out so well.

                          Dust control is critical as you can see the imperfections as shadows in bright light and like tiny bubbles when you look close. From three feet away though it looks great. Pick your poison.

                          Comment


                          • #15
                            Thanks a lot for posting,

                            I have one more question here, I was concerned that the Vivak sheet will adhere to the ABS sheet, it look like it is not the case. Seem to be a very good idea to avoid destroying the foam plug with manual pressure, do you think it can avoid the form to be crushed using a vacuum forming machine?

                            Another one, would you recommend to put an ABS sheet also on a cement gyspum plug?


                            Thanks

                            stéphane

                            Stéphane
                            Horizon Hobby Team Member

                            Comment

                            Working...
                            X