Announcement

Collapse
No announcement yet.

Lost foam ASK 21

Collapse
X
 
  • Filter
  • Time
  • Show
Clear All
new posts

  • Lost foam ASK 21

    I live on an out of use golf course and have access to some decent fairways for flying. I want to get a few things built around 3 meters or so to fly there using a motor in the nose (Sorry!) to hand or dolly launch. I really enjoy aerotowing but with a plane of this type I can fly several times a week instead of once or so a month. I may be able to talk some local friends into the occasional tow with an electric tug as well.

    I started a Nemere at 1:6 scale, 3.33m and a Duo Discus at 1:5 scale, 4m in another thread and then realized for my first attempt at most of these processes I'd be advised to stick to something more straightforward. No trailing ailerons, elliptical tail feathers, polyhedral breaks etc.

    I've always liked the looks of the ASK 21 so I'm starting one at 1:5 scale, 3.4 meter span.

    The wing cores are cut from pink/blue foam. You've seen cores before so no pictures yet.

    Here is where I begin to solicit advice. Did I mention this is my first build using these techniques?

    My current lay up schedule for the wings is 4 layers of 1.2oz cloth. 1st layer 20% span, 2nd layer 50%, 3rd layer 85%, 4th layer full span.

    I hope to end up under 96oz ready to fly. At this weight will I need a spar beyond the wing joiner? Wing loading would be 14oz per square foot or less.

    If I need a spar what do you recommend? I'll not be offended so if you have a "quick and dirty" (tow in a sanded slot, carbon tube, fishing rod blank?) as well as an "ultimate strength to weight solution", I'm open.

    Should I change the lay up schedule for skinning the wings?

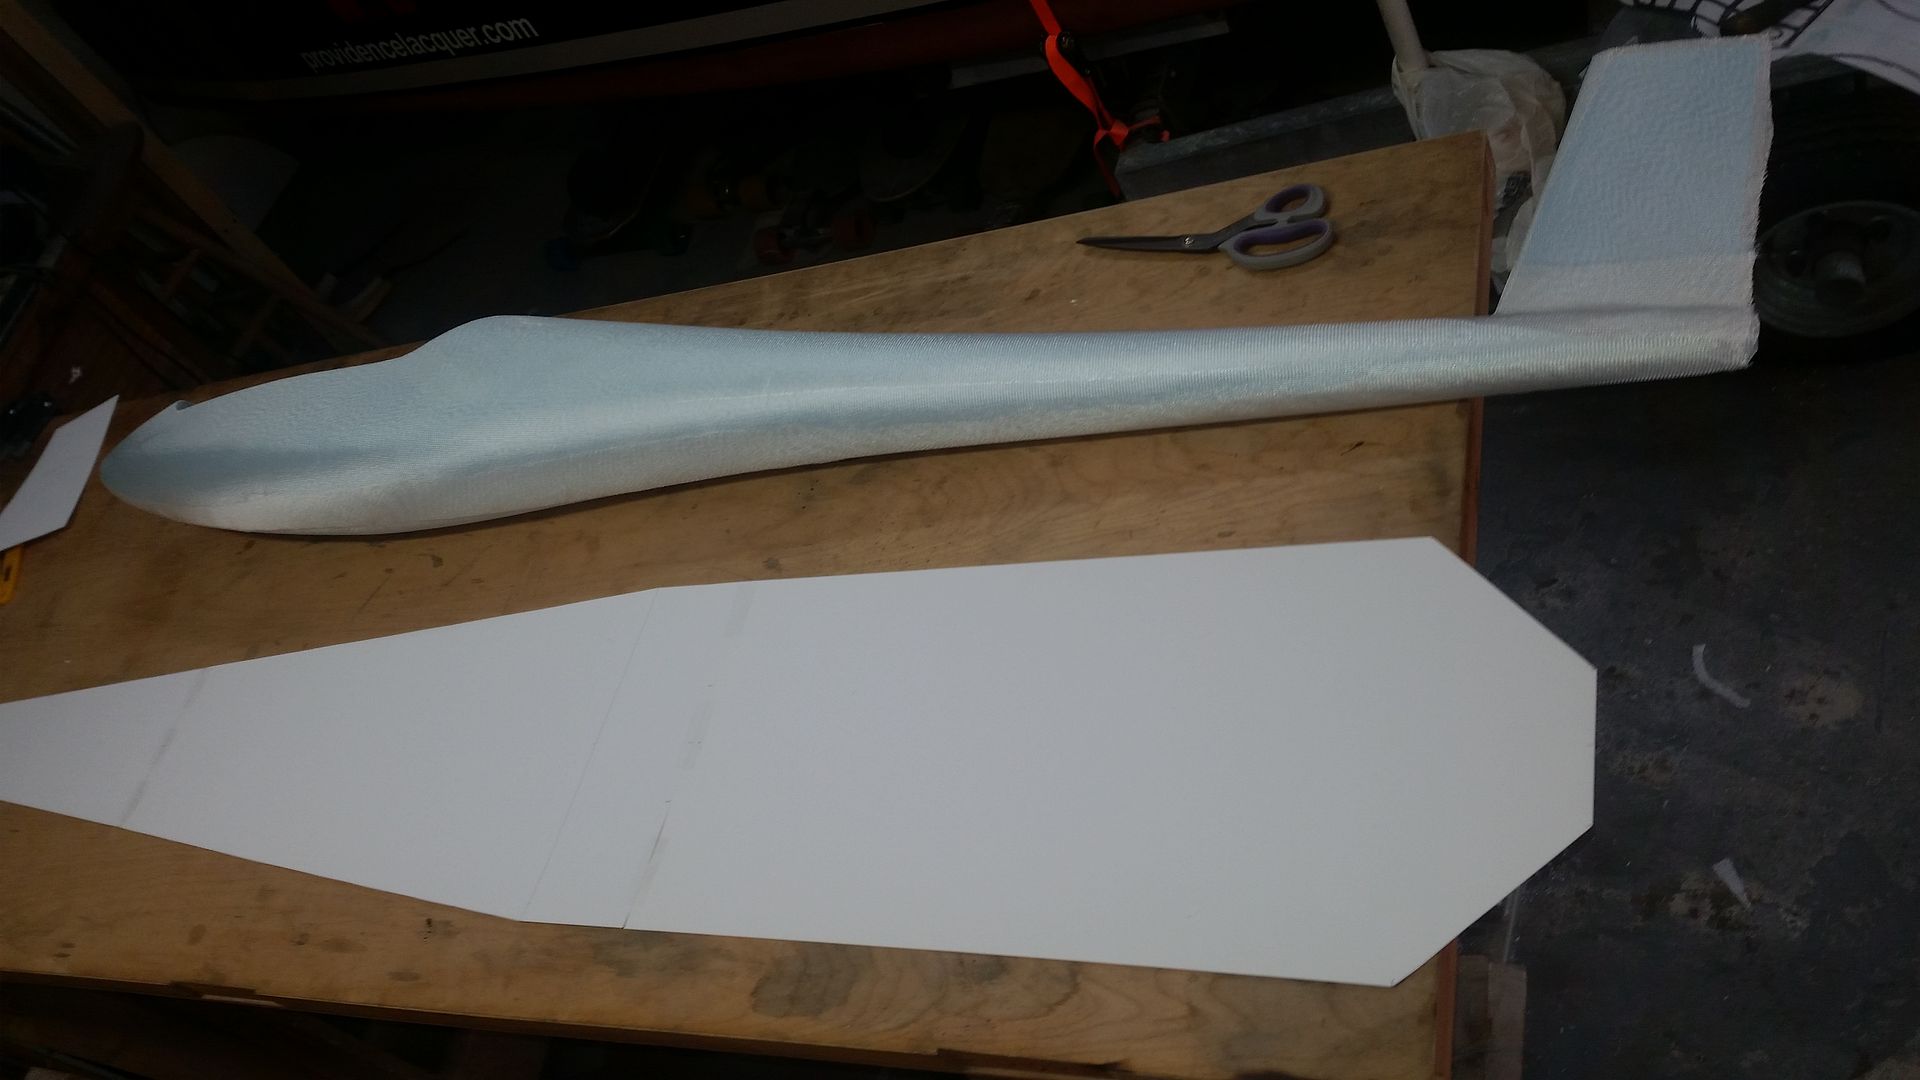
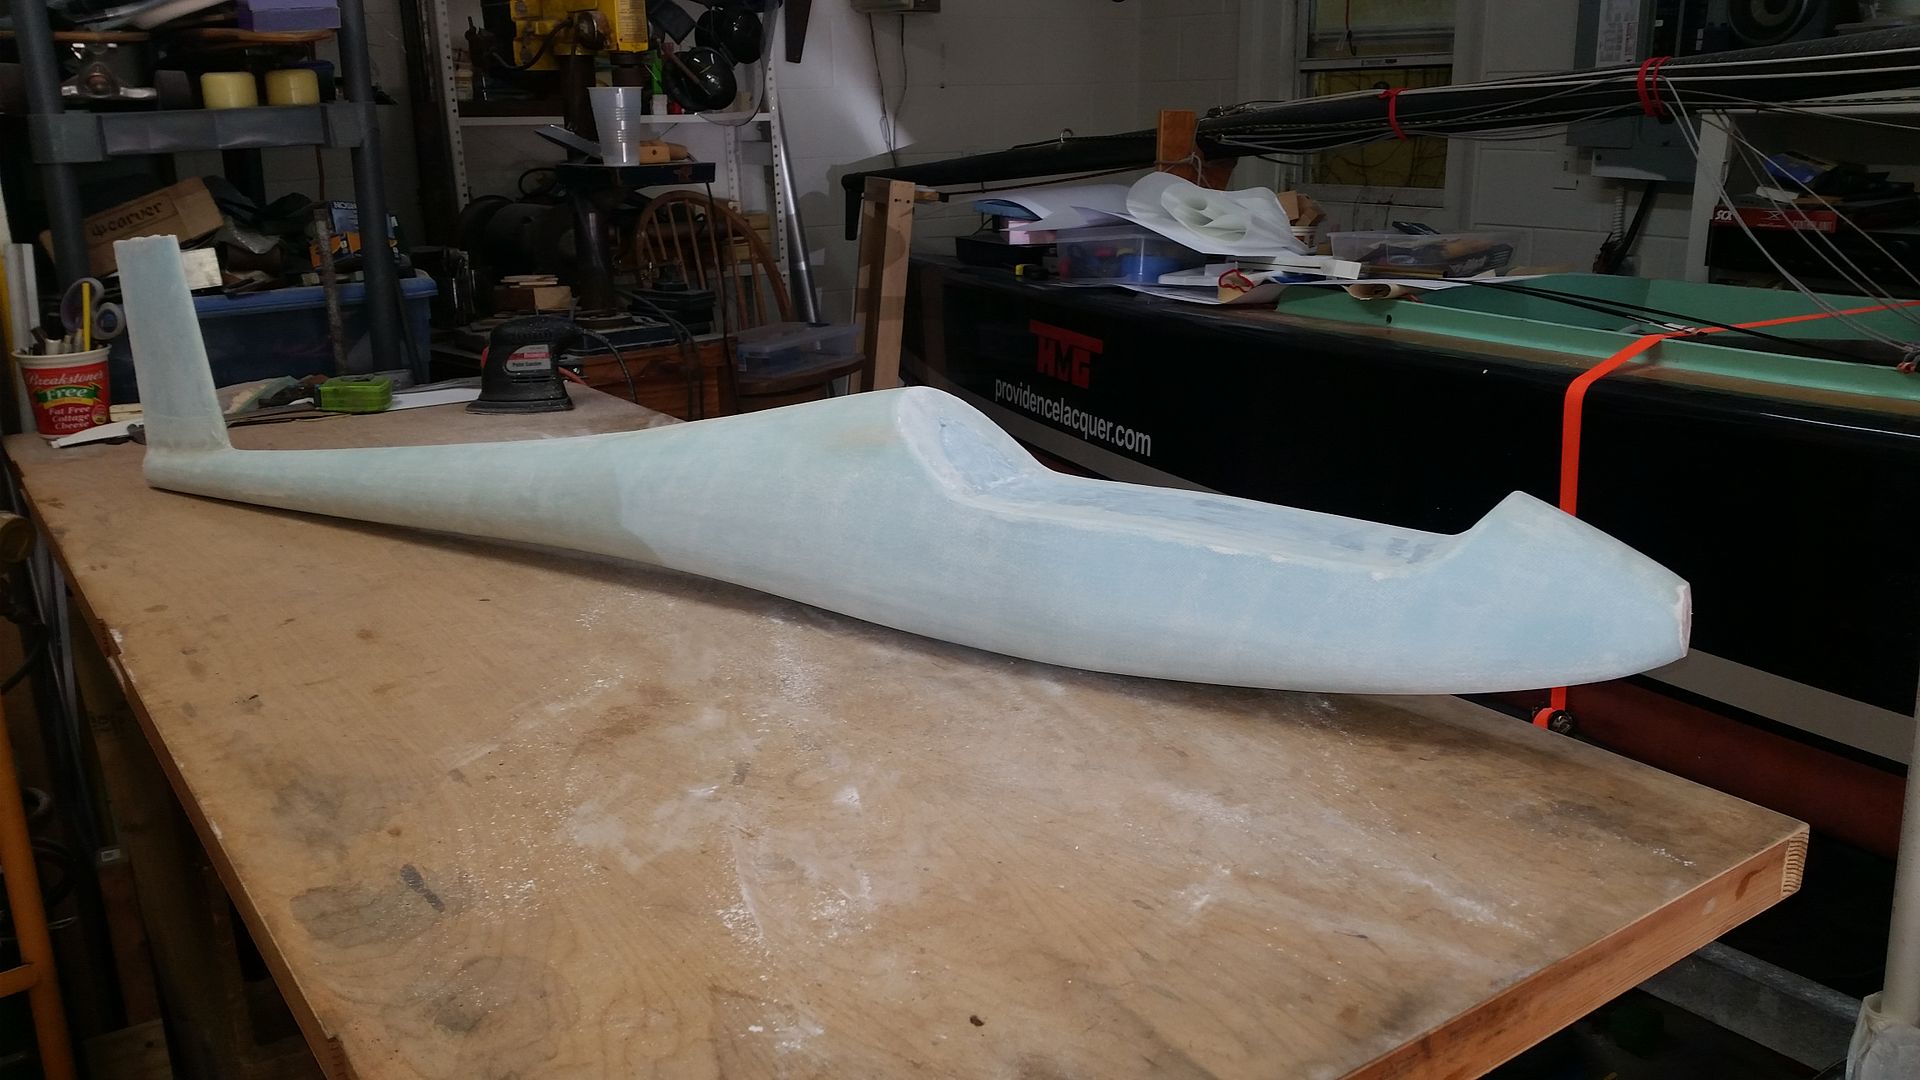
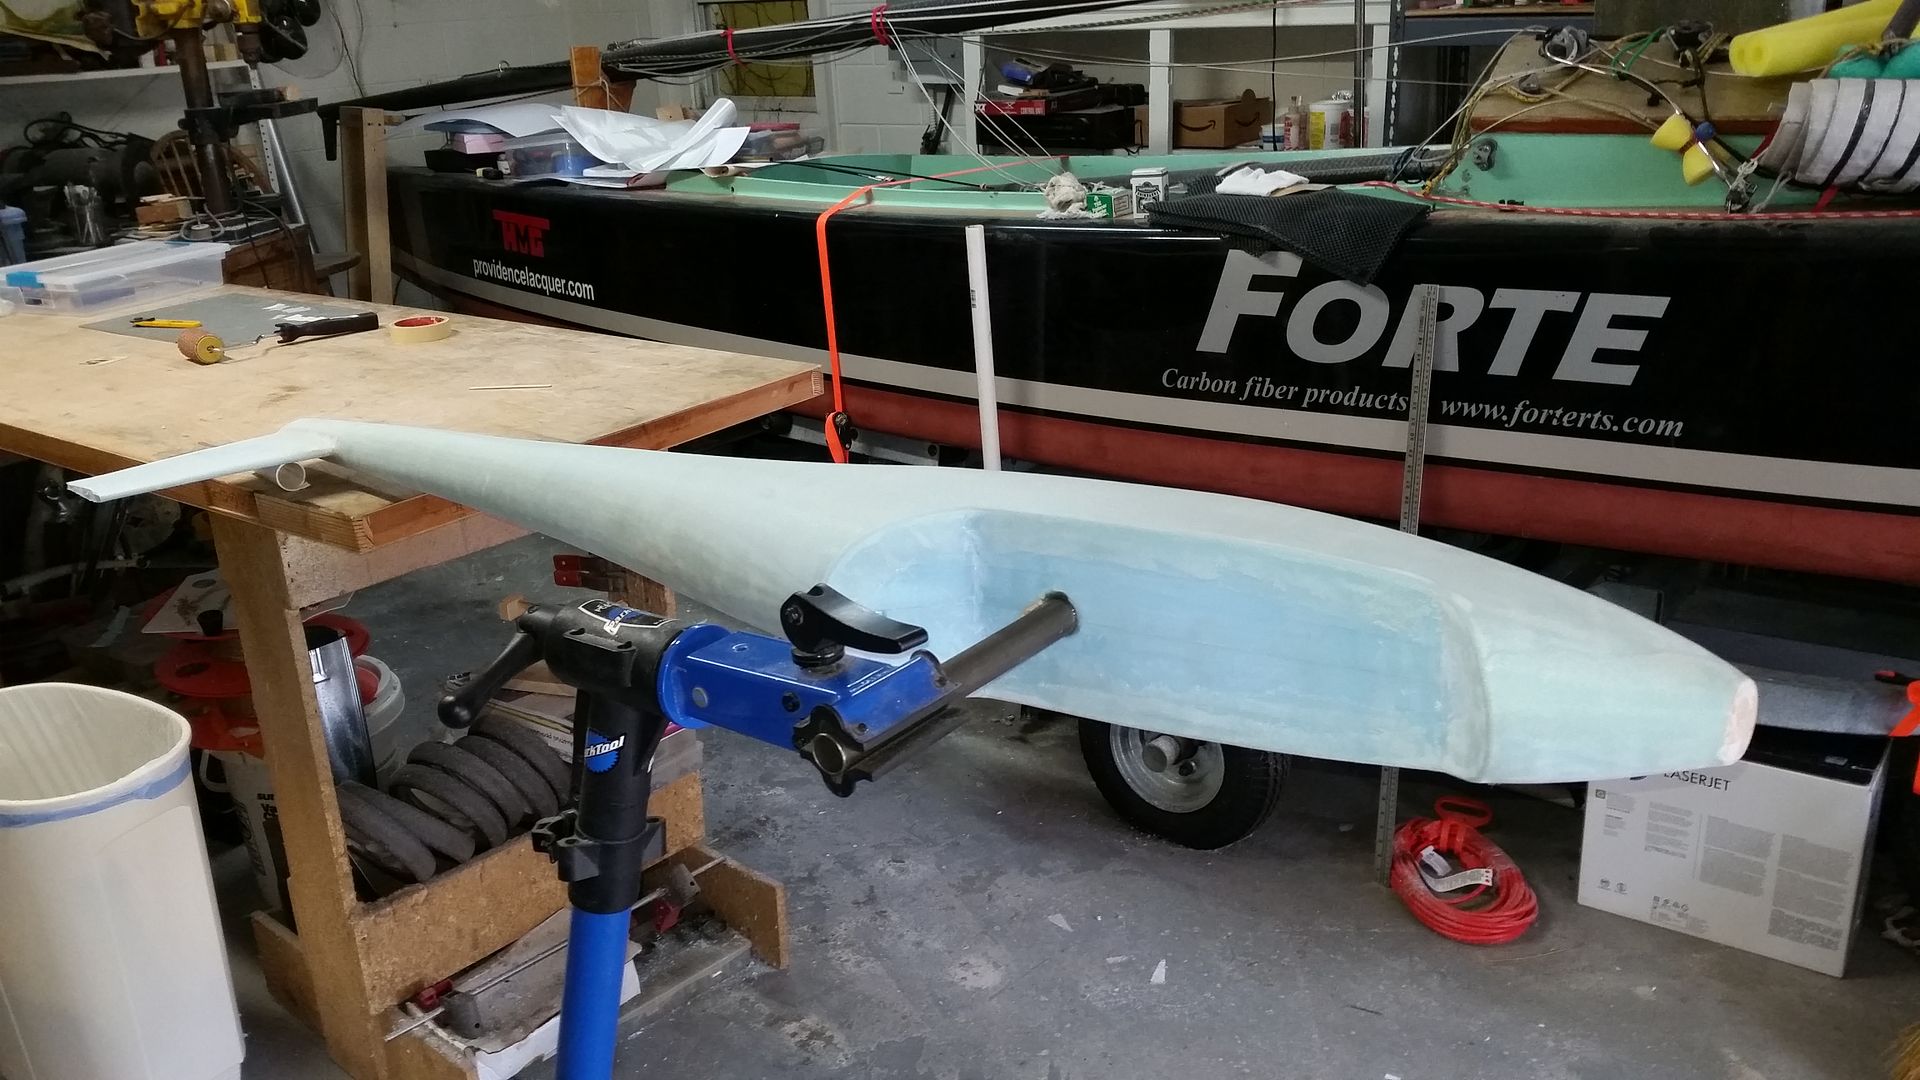
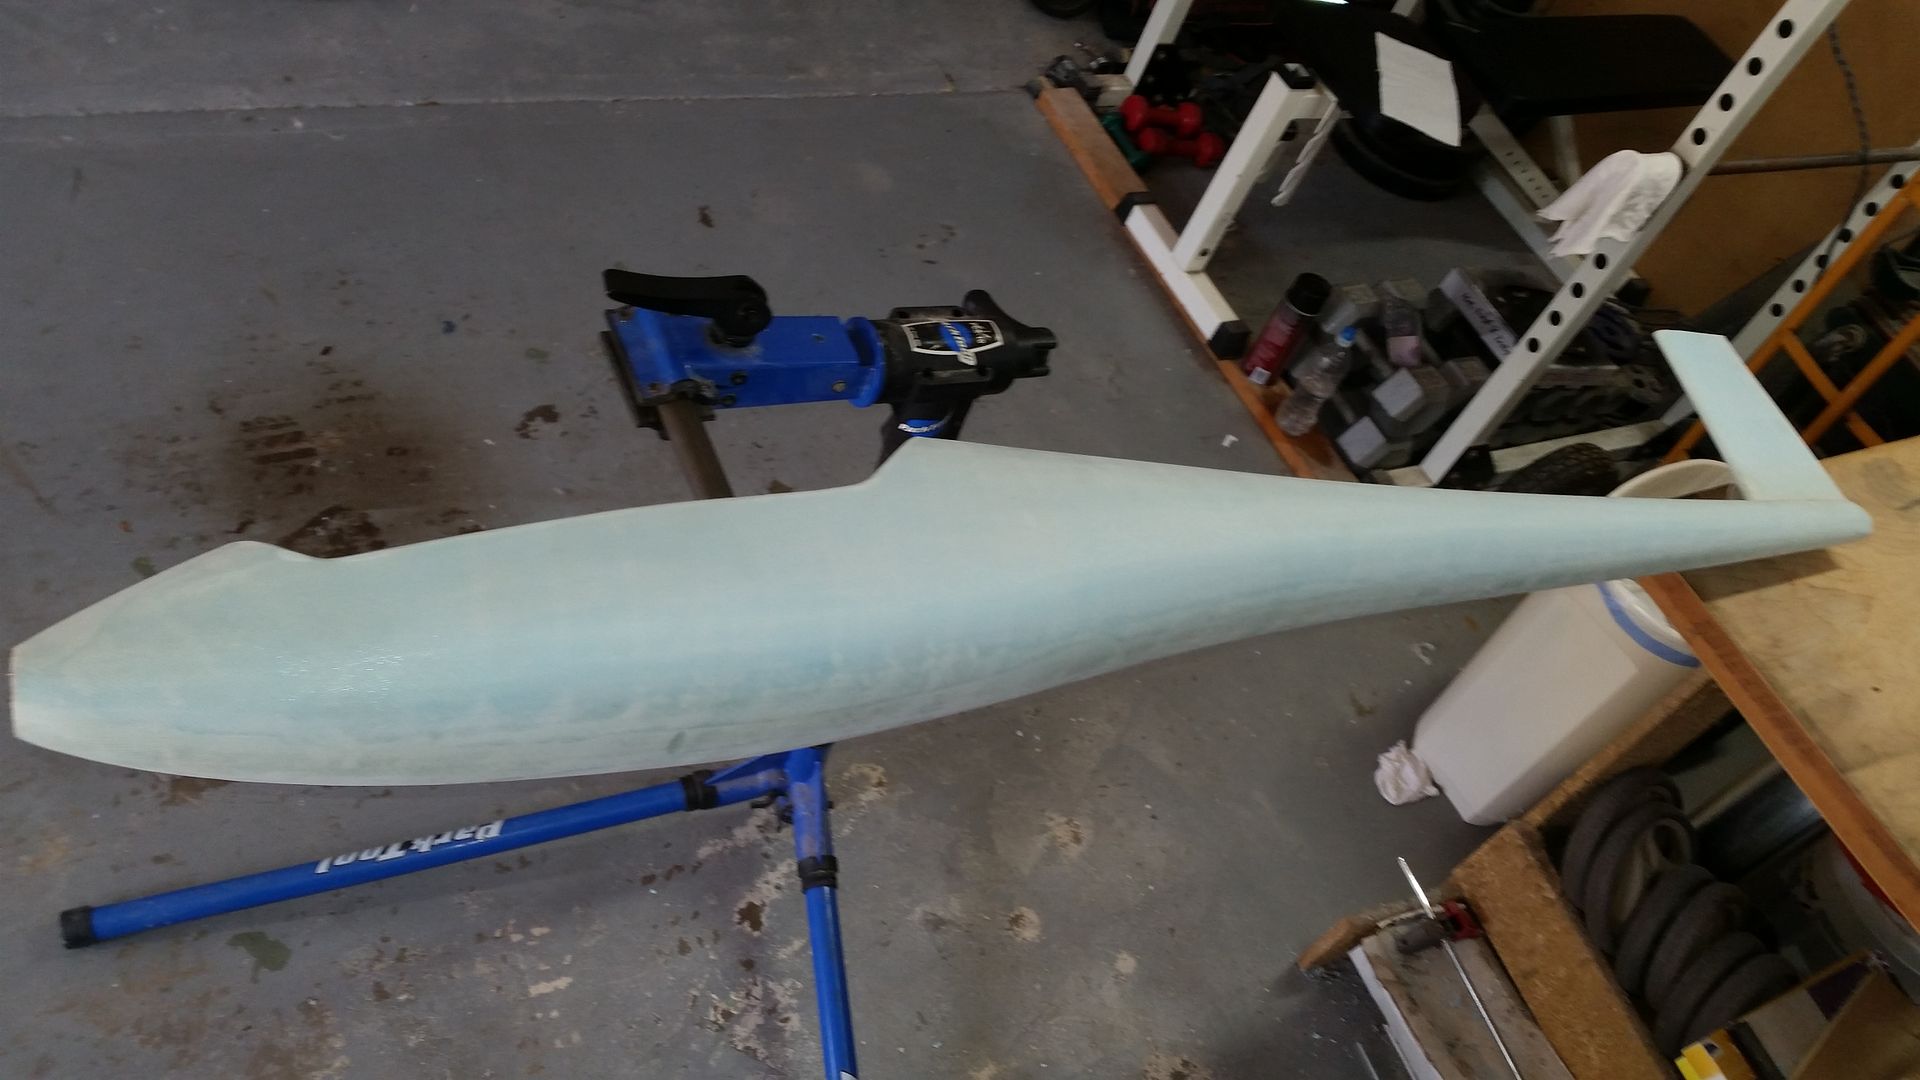
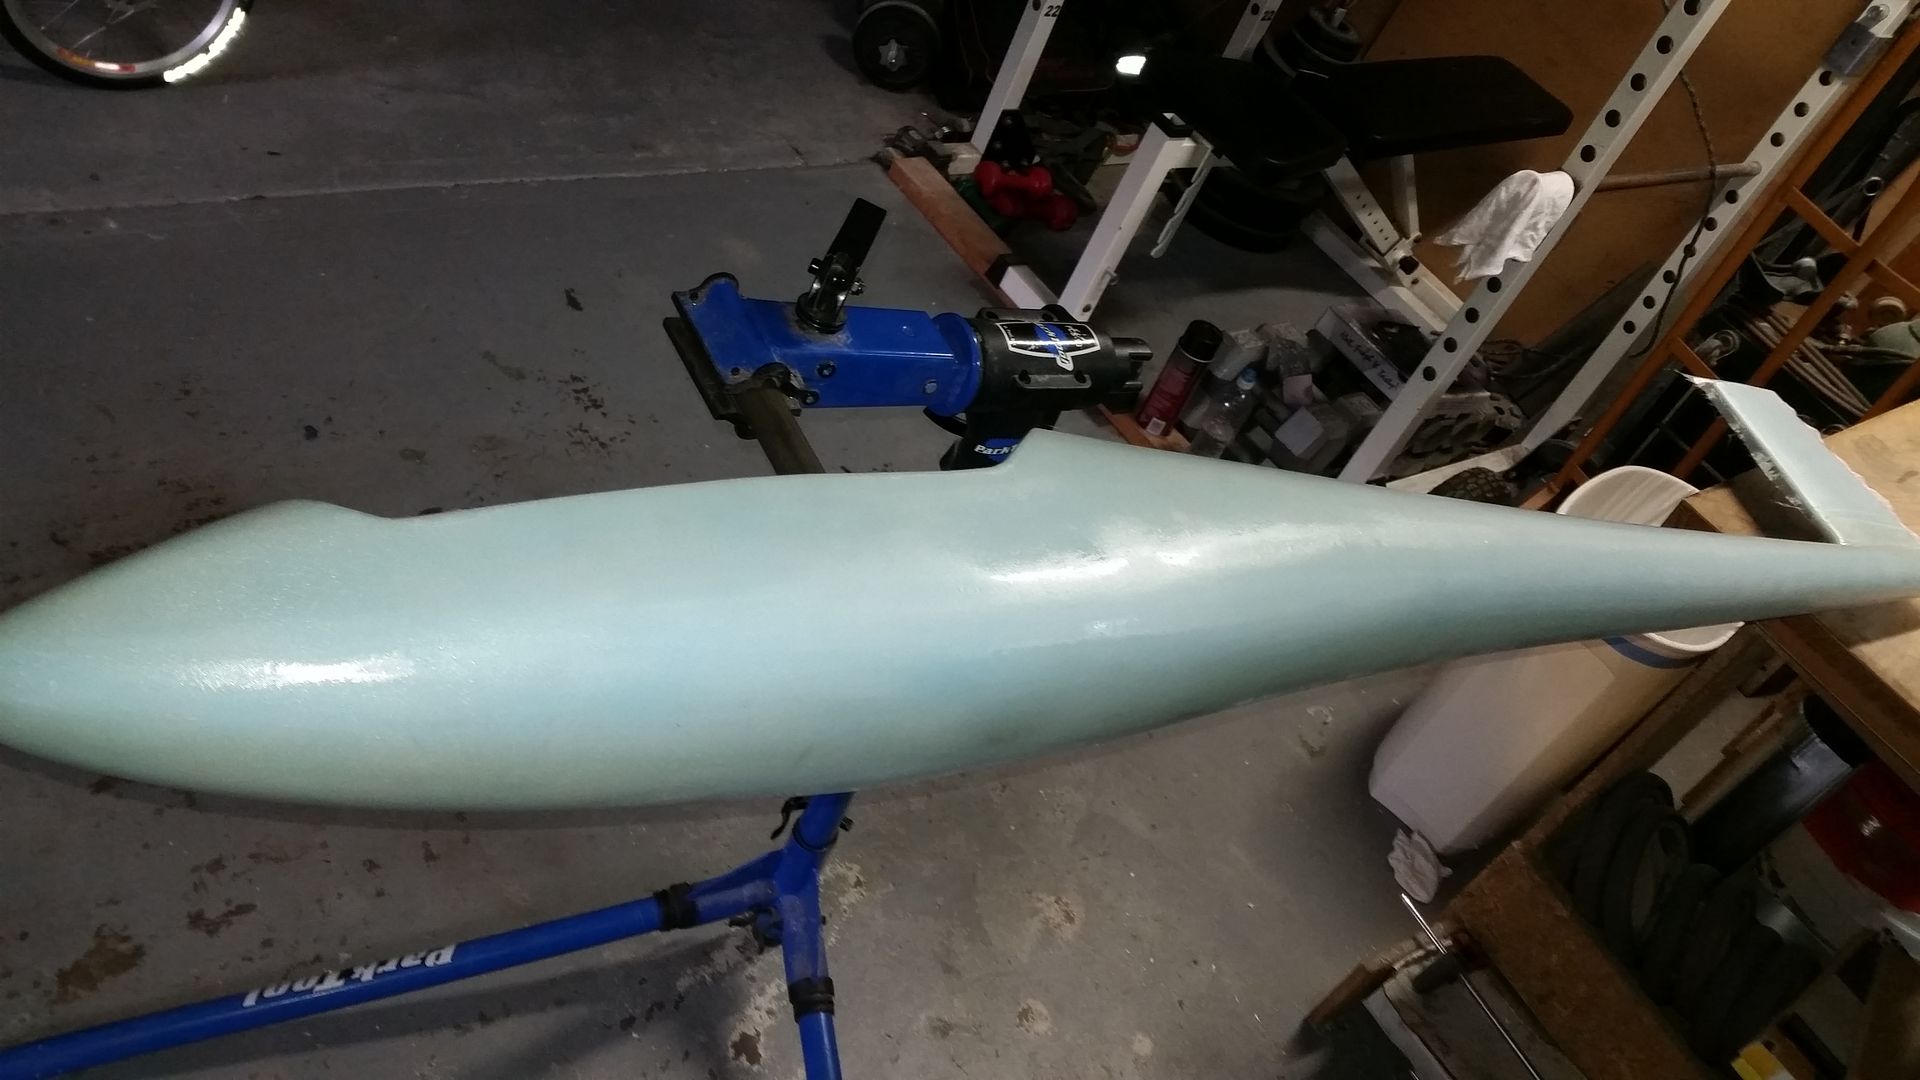
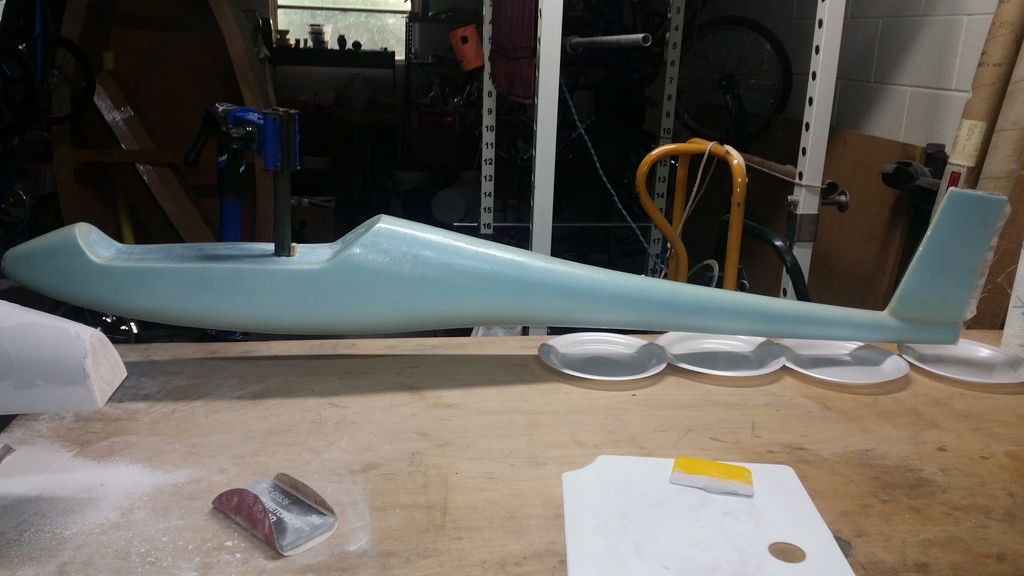
    Here are some pictures of the fuselage starting with the profile.


  • #2
    Next cuts are to the plan view.

    Comment


    • #3
      The next step is shaping with a sureform tool and some 80 grit on a sanding black. This step required about 1 hour.

      On the Nemere I sliced the fuselage into sections at this stage. Using the slices to make templates I hollowed the inside with a hot wire. I glued the sections back and used a sanding block to get to a foam thickness of 3/8" or so. One layer of 1.2oz glass was applied to the inside. After any necessary internal work I'll join the halves together and glass the outside.

      I think this technique could yield a lighter or stiffer fuselage than lost foam at the cost of probably 2 or 3 hours of additional labor.

      On the ASK 21 in an effort to speed things along I think will tape the core after a bit more sanding to fair it and then proceed with the lost foam method.

      I figure I should see if one of these will actually fly before investing too much time. There will always be another one.

      Comment


      • #4
        Still needed to add the vertical stabilizer before taping the plug. Vertical stabilizer was hotwire cut then the rudder portion was sliced off. A knife and sandpaper were used to notch the the back of the fuse for it. Finally the plug is taped. I'll try running a sealing iron over it to get rid of more of the wrinkles. Then it is time to apply glass.

        Comment


        • #5
          I'm going to experiment with Smooth-On Company's 'Smooth-Cast 45D' plastic coating. (I used Smooth-On's Reoflex 40 product to make wheels for my Vampyr). I had seen it before but forgotten it. Dion, a forum member and buddy in KY, re-introduced me to the product via a You-tube vid for we are in the process of making plugs for some scale projects. What you do is seal the foam plug with PVA then brush a few coats of the Smooth-Cast product onto the foam letting each coat dry thoroughly before the next. It forms a nice hard plastic coating over the foam which is reasonably smooth. You can sand and finish for a finer surface before adding even more coatings! Primer, paint and wax then pull molds off the end result to make your part. If this product works as imagined then a little time can be saved by eliminating the glass/resin process of plug finishing.

          Comment


          • #6
            Hi Brent,
            That's pretty darn impressive. You guys who make your own molds them actually pull sailplanes out of them really make me jealous. Congrats on the project and thanks for sharing with the group.

            Len
            Len Buffinton
            Team Horizon Hobby

            Comment


            • #7
              Nice stuff Brent, I'm tuned in and waiting for the next step!

              Jeremy and Ben
              SCCAAA TT TN

              Comment


              • #8
                This weekend's progress and lessons learned.

                Lesson 1 Less is more.
                This is my first attempt at lost foam, I should have known to set more modest stage goals. I may eventually progress to more ambitious stage goals but it would have been more relaxing to do smaller steps and more of them.

                Lesson 2 Come up with a good jig to hold the plug before you start. You’ll see my solution later but my wife would have been happier if she hadn’t been called to help in the middle of the first layup.

                So here is what I did do.
                1) Sprayed the packing tape covering with a mist coat of 3M77.
                Good.
                2) Precut 2 pieces of 6 oz cloth at +/-45 degrees and 2 pieces at 0/90 using the template shown. It wasn’t intended to be a perfect fit but it did get me reasonably close to the right size and shape.
                Good
                3) Applied the two pieces of bias cut 6oz cloth to both to the entire fuselage in two pieces, one for each side.
                Good or Bad?
                In retrospect I think doing one side only might have been better but I don’t feel strongly and could see repeating this step in a future build. The mist coat of 3M77 made this a pretty easy process.

                4) Mixed up 72 grams of resin and used an epoxy roller to wet out the one side of the first layer of 6oz cloth. A second batch of the same size was used to wet out the second side. Good.
                To have stopped at his point that would have been the best plan at my current skill level. I used a slow set resin and the roller made easy work of the wetting out.
                Bad
                I should have had a working jig ready. This is the point at which I had to call my wife to help hold things. She is a trooper but it was a boring hour and some minutes for her from this point listening to me mumble about the vicissitudes of composite work. .
                5) Mixed a third batch of resin and returned to the first side to add a layer of 6oz 0/90. Bad
                This was, as expected, harder to get to lay down properly and the whole fuselage already being covered with one layer of wet cloth and resin didn’t add to the overall pleasure.

                In the end it turned out better than I could have hoped with only one small area that pulled away right at the tail. Here is the fuselage after curing overnight and being block sanded with 80 grit. All in all it looks surprisingly good at this stage. It weighs about 36oz as shown. I’m guessing about half of that is foam.
                Bad
                Yes I forgot to weight the foam first.


                Now for an image of the one man band jig I spoke of. I drilled a 1” hole in the foam then used 5 minute epoxy to add a piece of 1” tubing. This is clamped in my bicycle repair stand so I can work on both sides. Even better would be to plan for the original foam sheets to be glued around a piece of tubing running from end to end. You could support both ends, rotate then clamp it in any position. It would be very useful during the shaping of the plug.


                From the other side.


                Last step for the weekend was to apply a layer of 2.47oz cloth 0/90 to one side only. See, I can learn new tricks.
                Tomorrow night I should be able to do the second side including cleanup in about an hour.


                Since I’ve absolutely no experience with this type of construction I’ll add one more layer of 1.6oz cloth and then remove the foam. That should be informative.
                Last edited by BCarter; 09-25-2016, 10:39 PM.

                Comment


                • #9
                  So far so good! Go ahead and put the canopy section in there. You can cut it free, later, to use as a plug to pull canopy and as a template to make the canopy frame.

                  Comment


                  • #10
                    Michael,

                    The shaped canopy section visible in the photo from post #3 is set aside for just the purposes you describe. I read an article last week where a guy covered his foam canopy plug in several layers of paper mache, smoothed it with filler, primed and sanded it. When he got ready to pull the plastic canopy he wiped a little cooking oil on the plug to reduce the drag on the plastic. I may try it on a small mock up to see how it works out.

                    Comment


                    • #11
                      Great job, Brent!

                      The "learn as you go" approach you are doing (and some of the rest of us aspire to do) is challenging, often frustrating and probably as close to jazz model building as you can get. But like anything improvised, the more you do it and the more bad notes you stumble upon and learn from the better you'll get.

                      Keep up the great work!

                      Mike
                      Last edited by yyz; 09-26-2016, 04:34 PM.

                      Comment


                      • #12
                        BTW... I noticed the Park Tool stand. Do you mechanic your own rides? I always maintained my own and have a whole bunch of nice 'Campy' tools to wrench on my 'Campy' components!

                        Comment


                        • #13
                          I build most of my bikes from scratch. Did I mention I like to make stuff?

                          This is a replica of a 1893 Pedersen I saw while visiting friends in Germany. My wife has one too. The seat woven like a hammock and is suspended by bungees. Very comfortable.


                          This tandem is more of a bash. You can see the original mountain bike. It's inspired by the German Hase Pino.


                          I couldn't locate a picture of my wife's low racer recumbent trike. If you've never been on one they are like pedal powered racing carts.

                          Comment


                          • #14
                            Those are some crazy bikes! Looks like fun! Bet the Pedersen would be scary at speed downhill 'round a tight curve! It'd want to stand up on ya with that head tube angle!

                            Comment


                            • #15
                              A layer of 1.6oz cloth has been added. It’s tempting to add a layer of epoxy and micro balloons and begin smoothing it out but it makes more sense to complete the wing so the root rib can be used to make the root fairing. That way it can be filled and faired as a unit.


                              I’m guessing I’m 12-15 hours into this one at this point with 4-6 more to go. I want in the future to do some relatively quick and dirty stuff in the 2.5-3m span range. It would be nice to get a fuselage done a little quicker. Here is my process on this one in a nutshell. I'm open to shortcuts if anyone has a recommendation. On the plus side I have a fuselage that should finish with a minimum amount of filler. That benefit might not be that significant if I could trade it for less time invested.

                              Plug preparation.
                              1) Cut two rectangular foam blanks each over half fuselage thickness.
                              2) Tack glue them together.
                              3) Make cardstock templates for top and side view.
                              4) Hotwire cut side view.
                              5) Hotwire cut top view.
                              6) Hotwire cut canopy. I think I will omit this step in future and cut it out after glassing.
                              7) Rough shape fuselage using knife and sureform tool.
                              8) Get close to final shape using 80 grit on a block.
                              9) Hotwire cut and add vertical stabilizer.
                              10) Smooth with 150 grit on a block.
                              11) Cover with packing tape. Next time I’ll mist with 3M 77 first. I also want to try some heat shrink tubing like they use to cover retail packaging for this step.
                              12) Apply a coat of floor wax.

                              Glassing
                              13) Make cardstock templates to cut glass cloth. 1 piece for each fuselage half. Is it quicker to use smaller pieces or wrap it with strips?
                              14) Cut glass, in my case 4 pieces of 6oz, 2 pieces of 2.47oz and 2 pieces of 1.6oz. I also cut 2 pieces of 6oz, 2 pieces of 2.47oz and 2 pieces of 1.6oz for the vertical stabilizer.
                              15) Spray fuselage with 3M77
                              16) Apply 1 layer of 6oz cloth 45/45 to both sides of fuselage and stabilizer and trim.
                              17) Wet out glass with epoxy.
                              18) Apply 2nd layer of 6oz 0/90 to both sides of fuselage.
                              19) Block sand after cure to remove largest defects. Wash with water and scotch bright pad.
                              20) Apply 1 layer of 2.47oz 0/90 to both sides of fuselage. I actually did this in 2 sessions, one per side.
                              21) Block sand after cure to remove largest defects. Wash with water and scotch bright pad.
                              22) Apply 1 layer of 1.6oz 0/90 to both sides of fuselage.
                              23) Build up root fairing.
                              24) Fill and fair with epoxy and microballoons.

                              Comment

                              Working...
                              X